Welcome to the Moodle Deployment Guide for AWS Integration! Unlock the full power of Mattermost, the open-source collaboration platform designed for high-trust environments. Seamlessly integrate with your AWS infrastructure to achieve enterprise-grade scalability, secure messaging, and DevOps-friendly automation. Empower your teams with real-time communication, workflow orchestration, and extensibility for mission-critical operations. Let's get started and elevate your productivity with Moodle on AWS.
Prerequisites
Before you get started with the MoodleAMI, ensure you have the following prerequisites:
- Basic knowledge of AWS services, including EC2 instances and CloudFormation.
- An active AWS account with appropriate permissions.
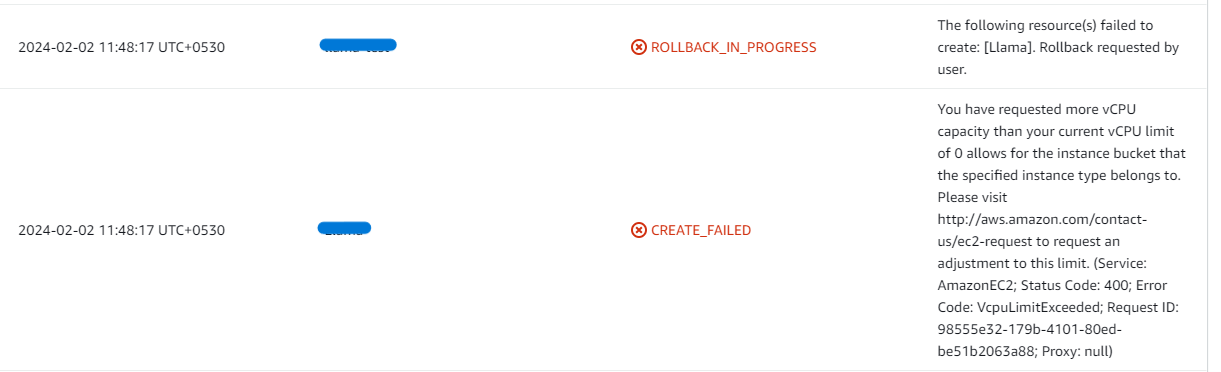
- Enough vCPU limit to create instance
(Follow this guide blog to ensure this)
Launching the AMI
Step 1: Find and Select 'Moodle' AMI
- Log in to your AWS Management Console.
- Navigate to the 'Moodle' in AWS Marketplace.
Step 2: Initial Setup & Configuration
- Click the "Continue to Subscribe" button.
- After subscribing, you will need to accept the terms and conditions. Click on "Accept Terms" to proceed.
- Please wait for a few minutes while the processing takes place. Once it's completed, click on "Continue to Configuration".
Step 3: Launching the Instance
- Select the "CloudFormation script to deploy Mattermost" as the fulfilment option and choose your preferred region on the "Configure this software" page. Afterward, click the "Continue to Launch" button.
- From the "Choose Action" dropdown menu in "Launch this software" page, select "Launch CloudFormation" and click "Launch" button.
Create CloudFormation Stack
Step1: Create stack
- Ensure the "Template is ready" radio button is selected under "Prepare template".
- Click "Next".
Step2: Specify stack options
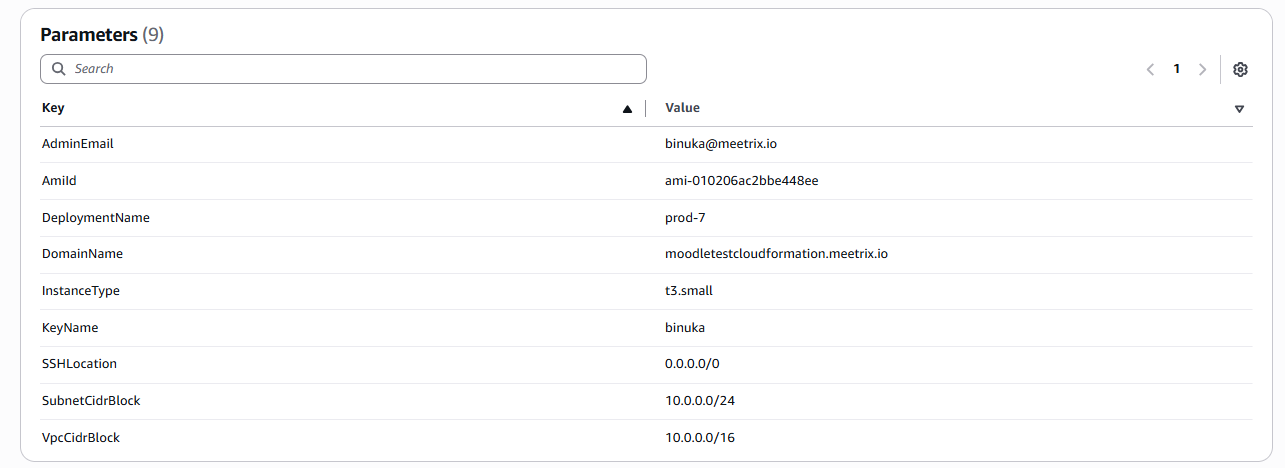
- Provide a unique "Stack name".
- Provide the "Admin Email" for SSL generation.
- For "DeploymentName", enter a name of your choice.
- Provide a public domain name for "DomainName" (SSL will not be set up automatically. After deployment, you must manually log in to the server and run the SSL setup command.
- Choose an instance type, "InstanceType" (Recommended: t3.small).
- Select your preferred "keyName".
- Set "SSHLocation" as "0.0.0.0/0".
- Keep "SubnetCidrBlock" as "10.0.0.0/24".
- Keep "VpcCidrBlock" as "10.0.0.0/16".
- Click "Next".
Step3: Configure stack options
- Choose "Roll back all stack resources" and "Delete all newly created resources" under the "Stack failure options" section.
- Click "Next".
Step4: Review
- Review and verify the details you've entered.
- Tick the box that says, "I acknowledge that AWS CloudFormation might create IAM resources with custom names".
- Click "Submit".

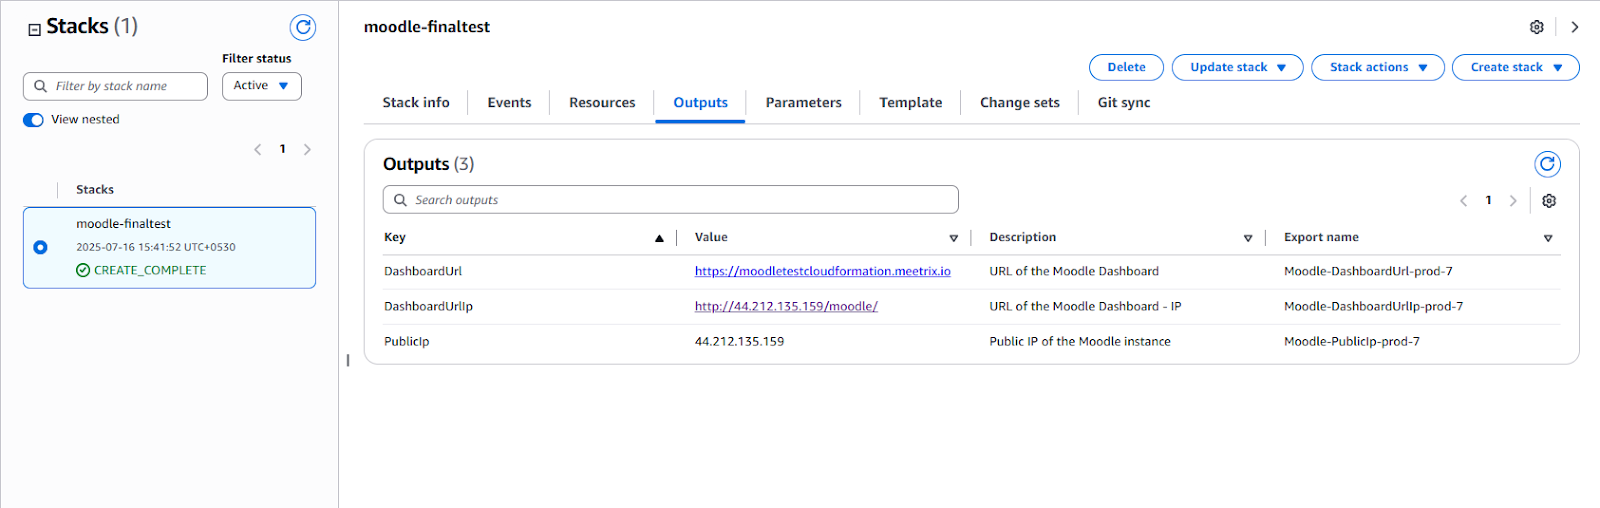
Afterward, you'll be directed to the CloudFormation stacks page.
Please wait for 5-10 minutes until the stack has been successfully created.
Update DNS
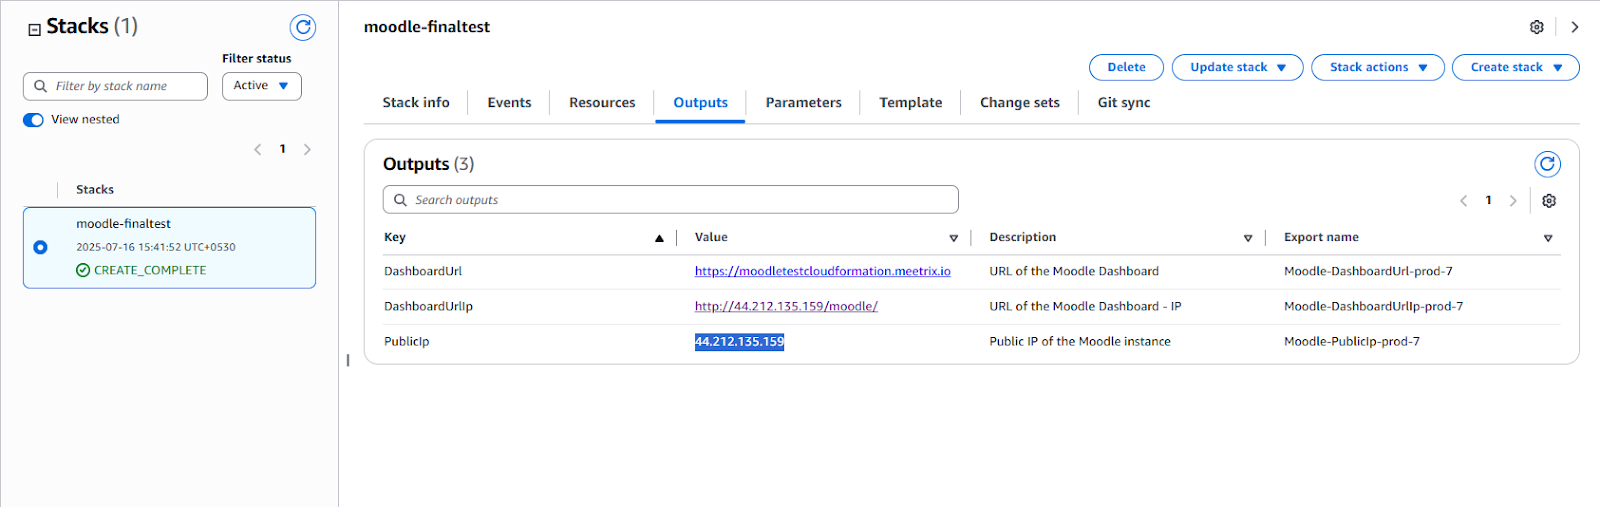
Step1: Copy IP Address
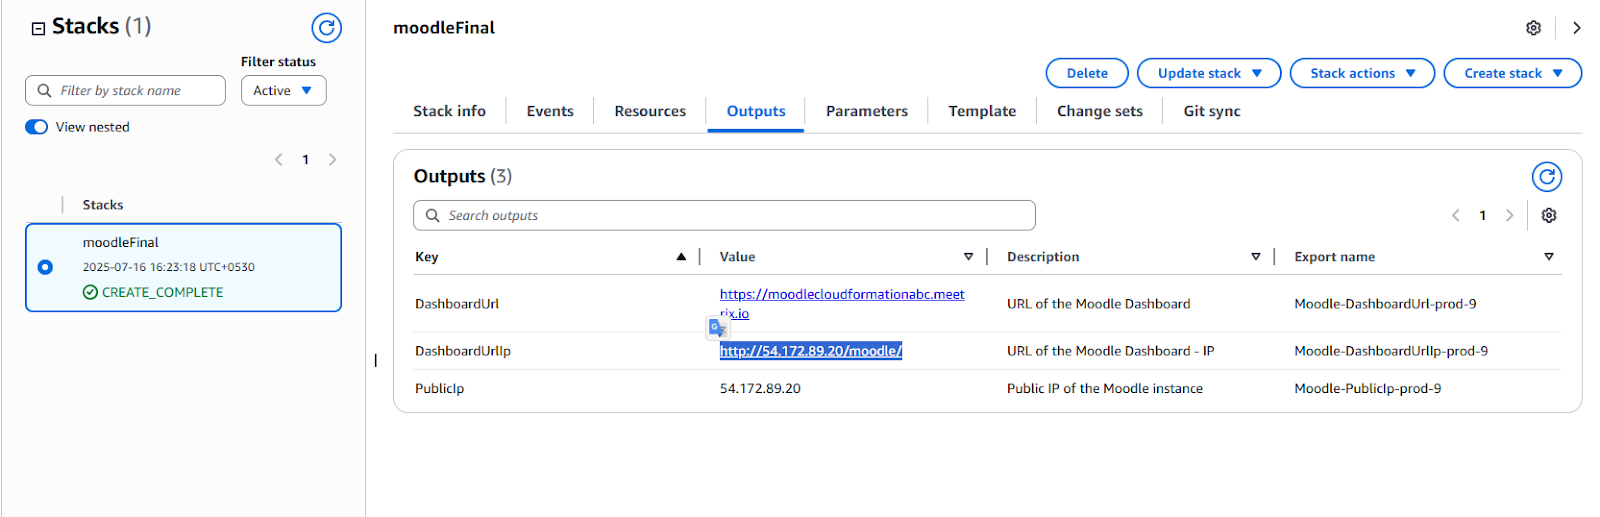
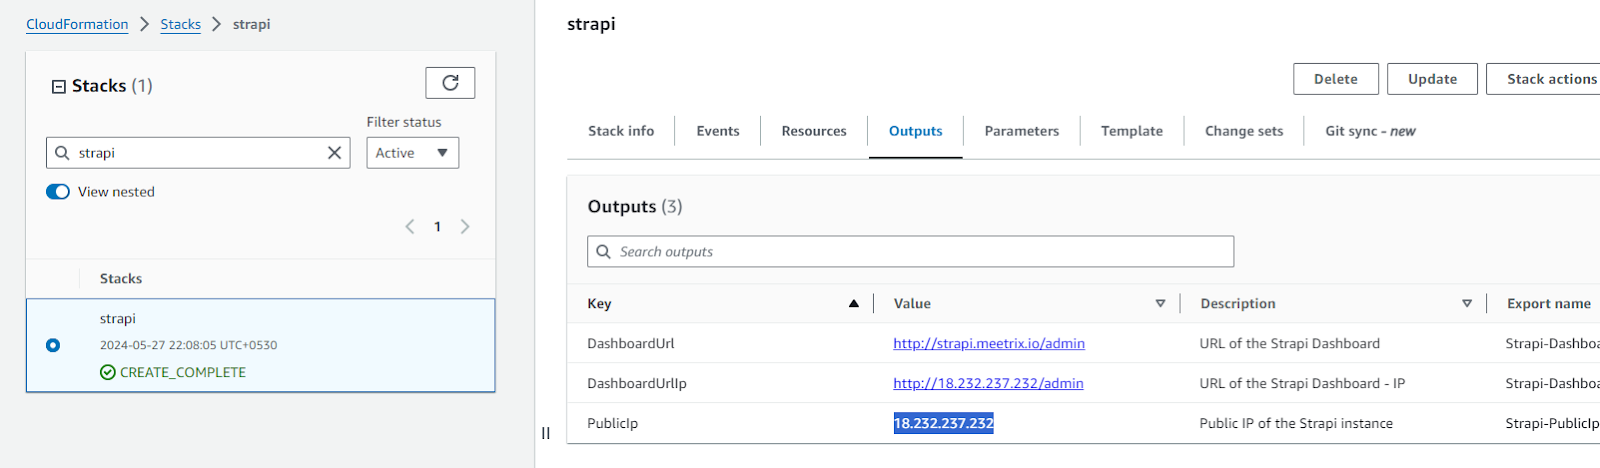
Copy the public Ip labeled "PublicIp" in the "Outputs" tab.
Step2: Update DNS
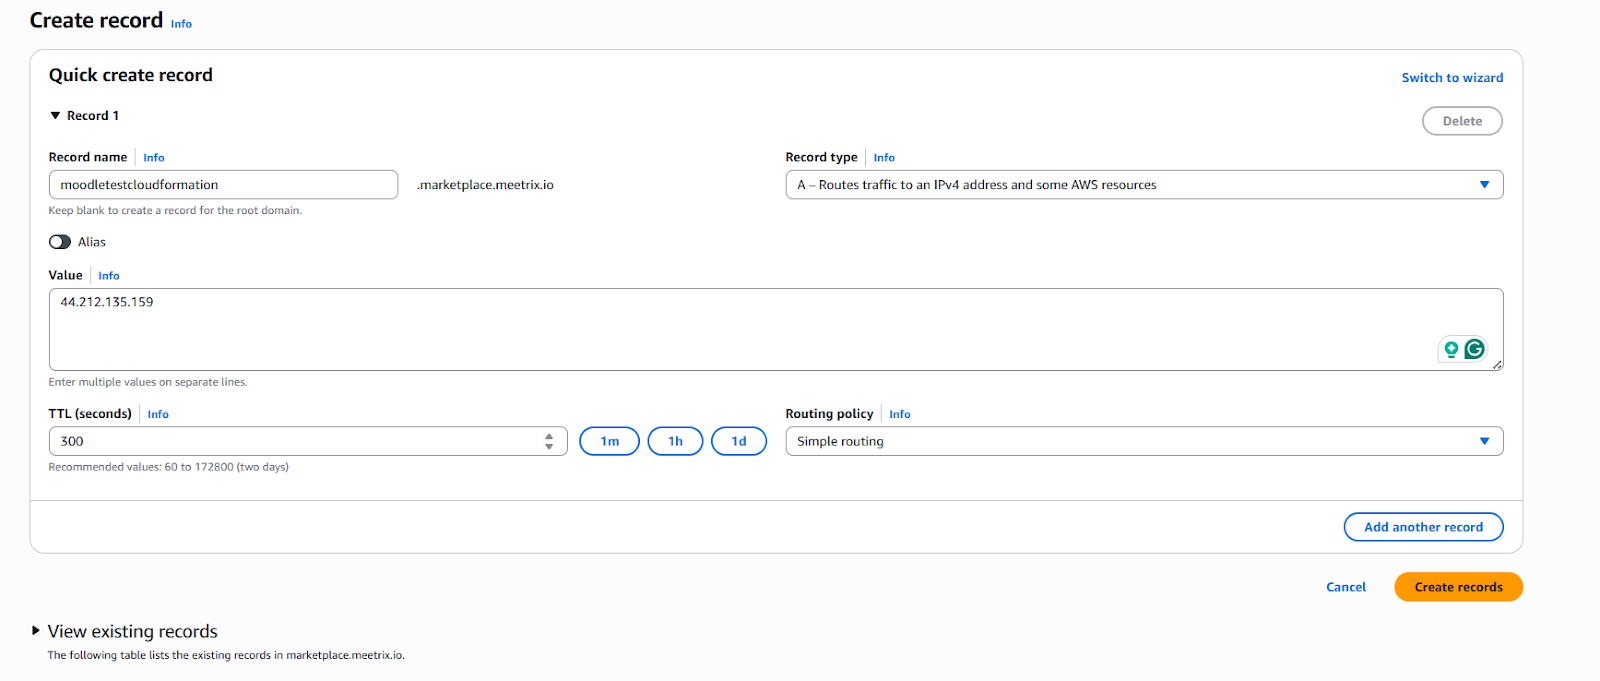
- Go to AWS Route 53 and navigate to "Hosted Zones".
- From there click on Create record.
- Add record name and then paste the copied "PublicIp" into the "value" textbox.
- Click "Save".
Access Moodle
You can setup the Moodle application through the "DashboardUrl" or "DashboardUrlIp" provided in the "Outputs" tab. This will allow you to create an Admin account and all the future accounts will be created through the Admin panel.
(If you encounter a "502 Bad Gateway error", please wait for about 5 minutes before refreshing the page)
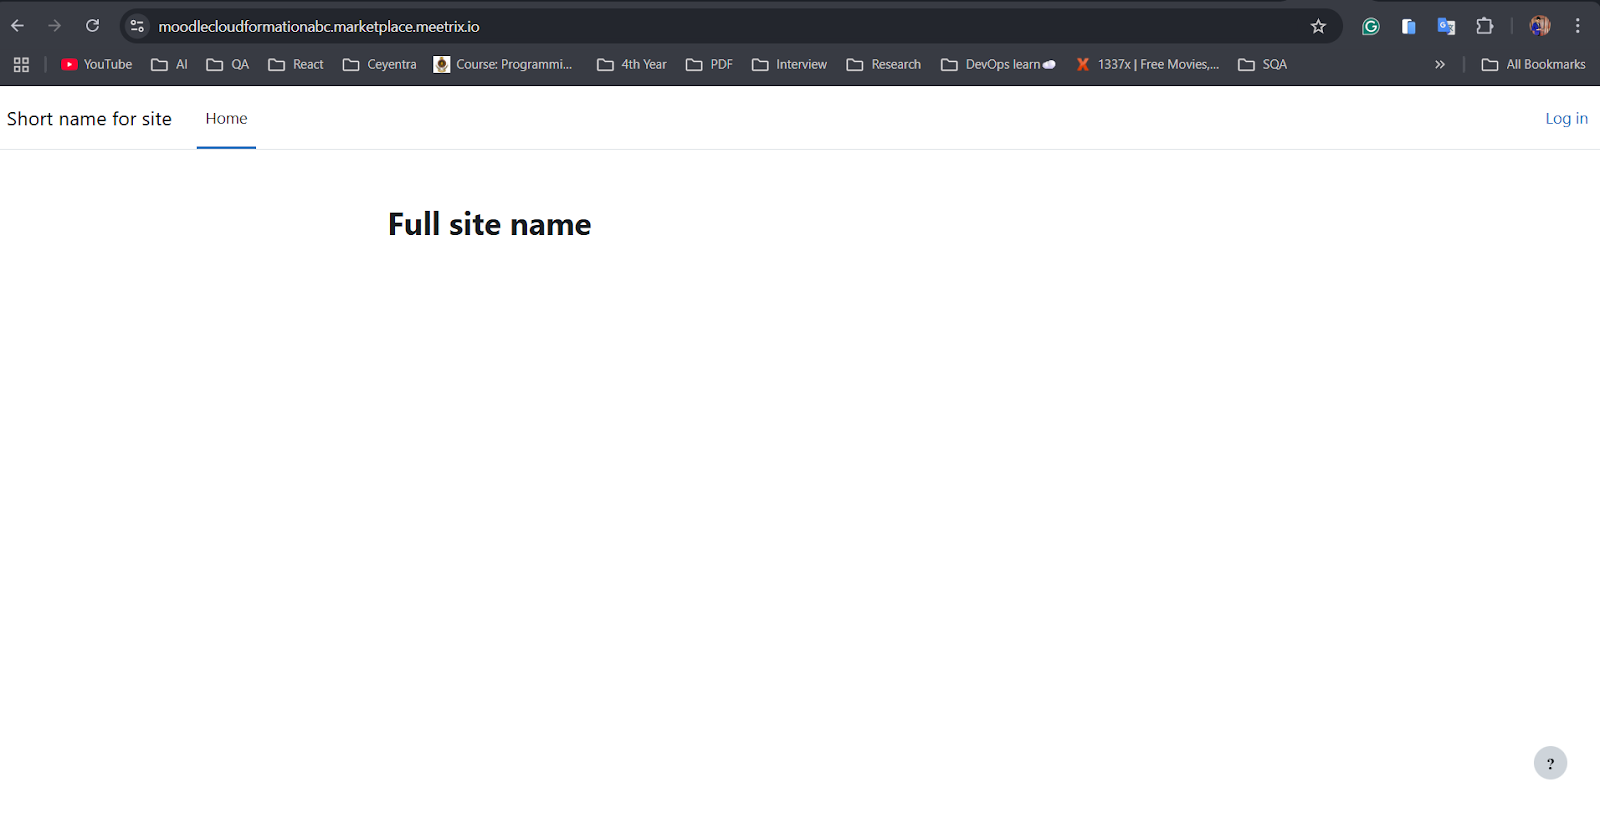
Go to login
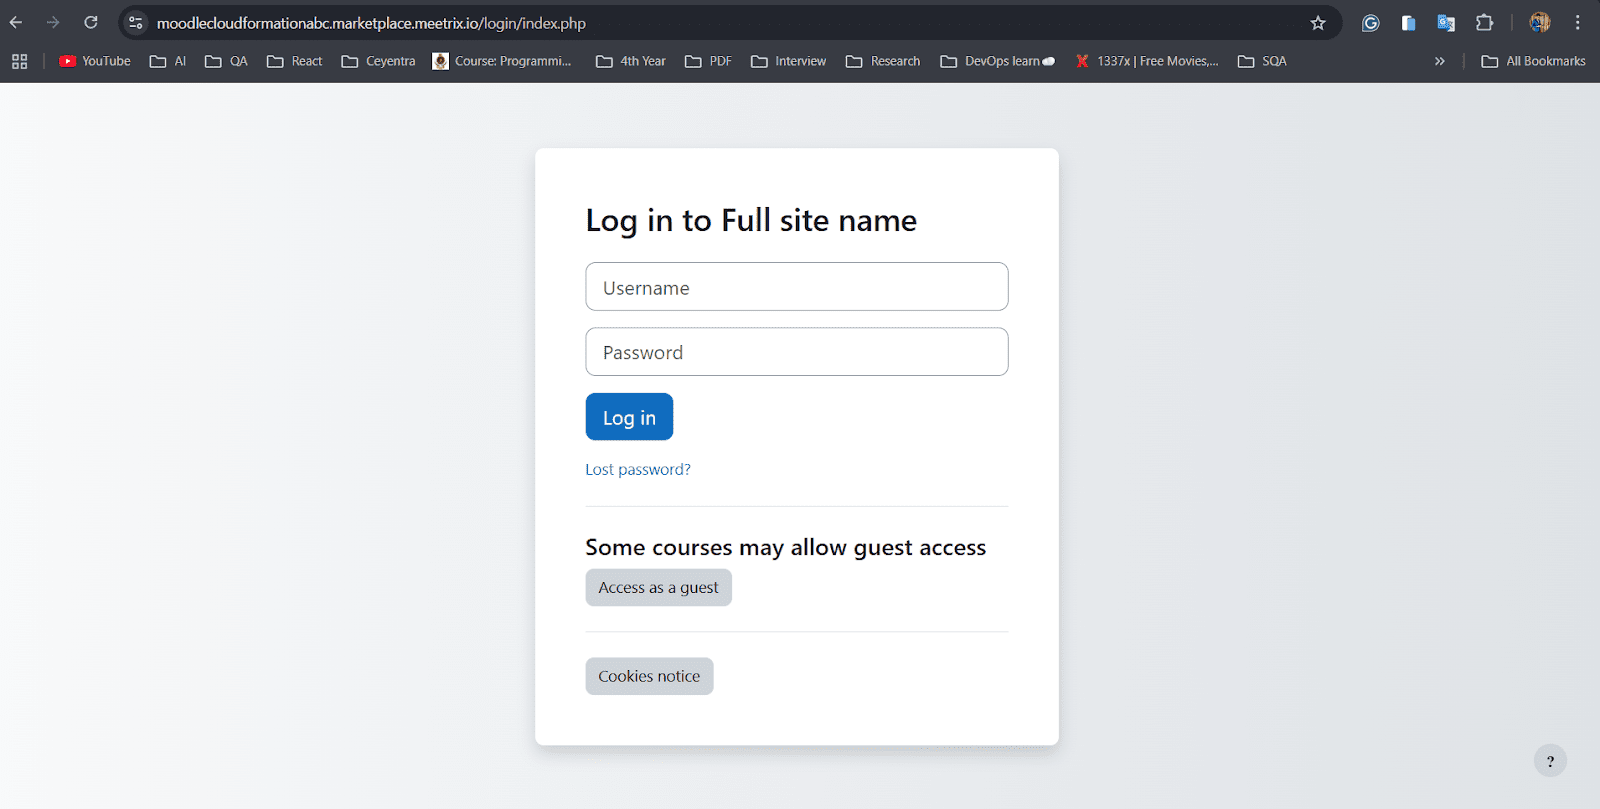
Username : admin
Password : Admin@1234
(This is a temporary password. You will be required to change it upon your first login.)
Navigate user profile and change user name, password, admin email
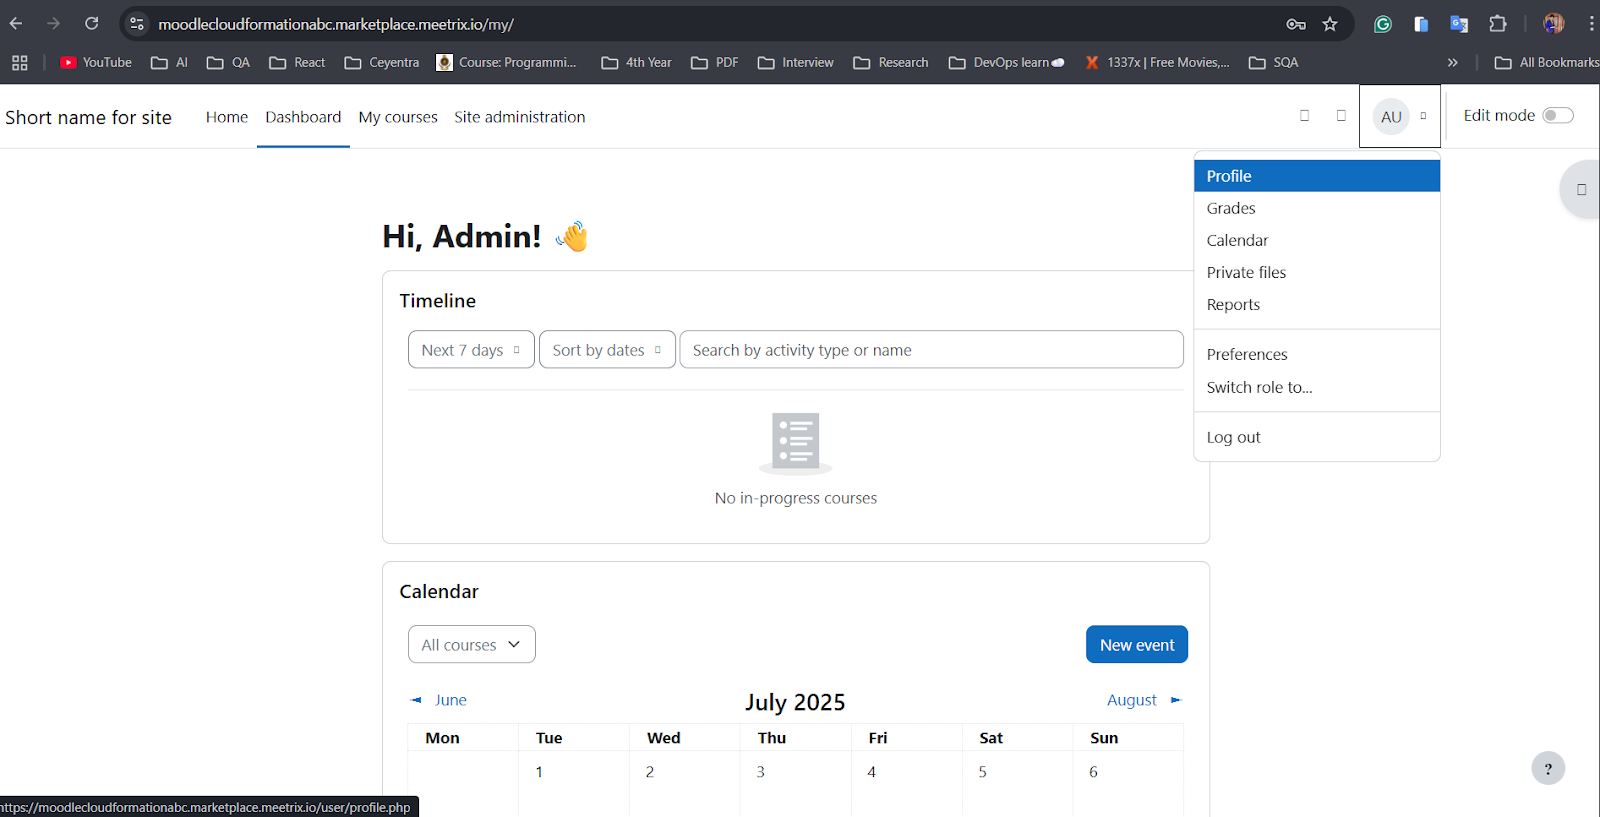
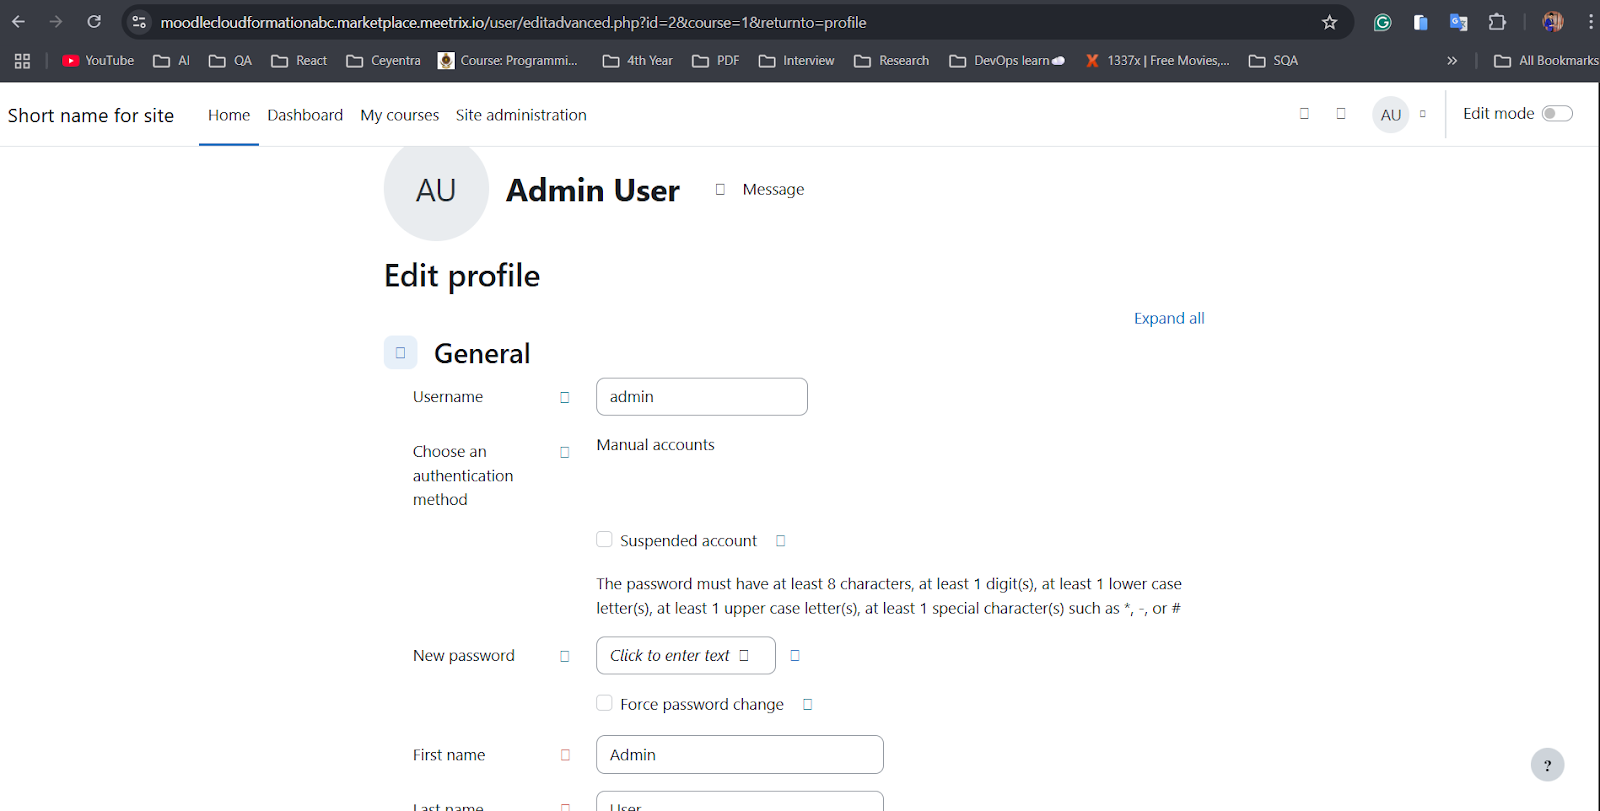
Enter all the required details and click on the "Update profile" button.
Important: You are now creating the Administrator Account for your Moodle deployment. The email address and password you provide here will be used to manage your entire workspace including inviting team members, configuring system settings, and maintaining overall access.
Make sure to choose a strong password and store your credentials securely, as they are critical for future access and team management.
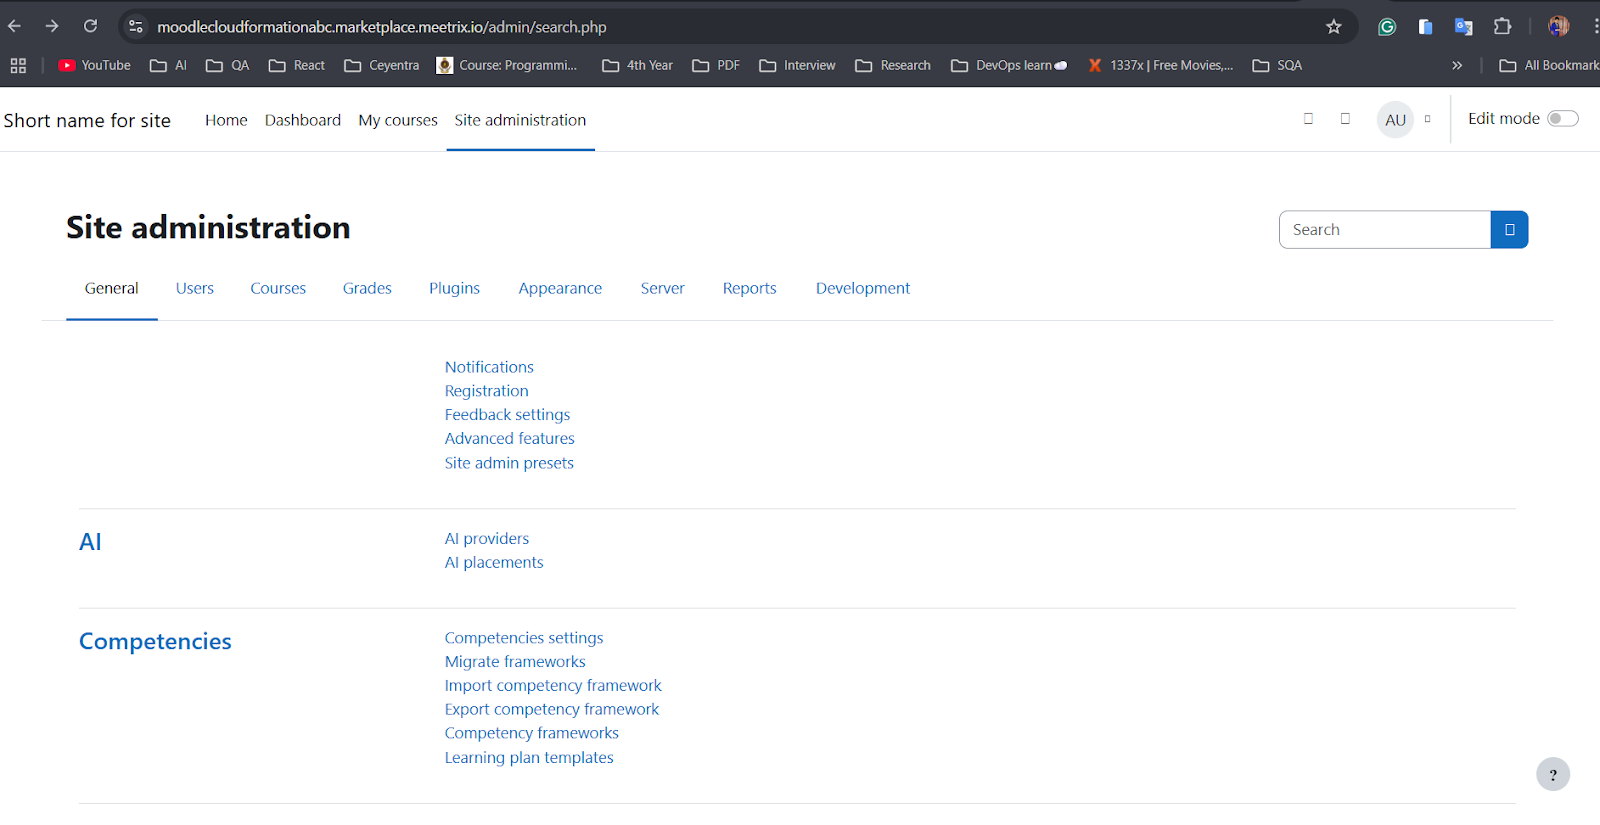
After logging in, go to the "Site administration" tab. From there, you can customize and configure various aspects of your Moodle LMS, such as courses, users, appearance, and plugins.
Generate SSL Manually
You need to configure SSL manually after deployment.
Step1: Copy IP Address
- Proceed with the instructions outlined in the above "Update DNS" section, if you have not already done so.
- Copy the Public IP address indicated as "PublicIp" in the "Outputs" tab.
Step2: Log in to the server
- Open the terminal and go to the directory where your private key is located.
- Paste the following command into your terminal and press Enter:
ssh -i <your key name> ubuntu@<Public IP address>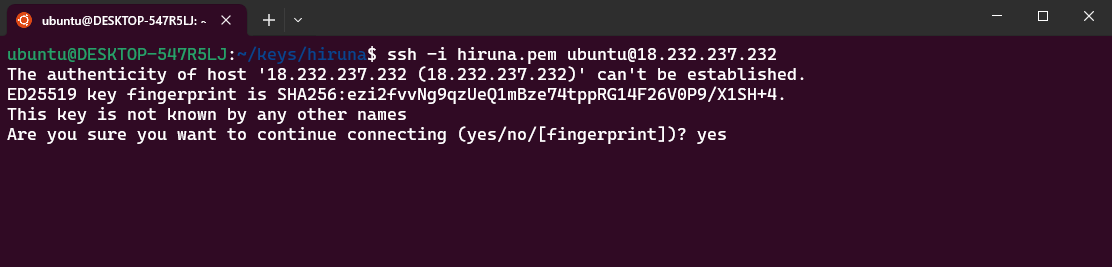
- Type "yes" and press Enter. This will log you into the server.
sudo /opt/scripts/ssl.shAdmin Email is acquiring for generate SSL certificates.
Check Server Logs
Step1: Log in to the server
- Open the terminal and go to the directory where your private key is located.
- Paste the following command into your terminal and press Enter:
ssh -i <your key name> ubuntu@<Public IP address>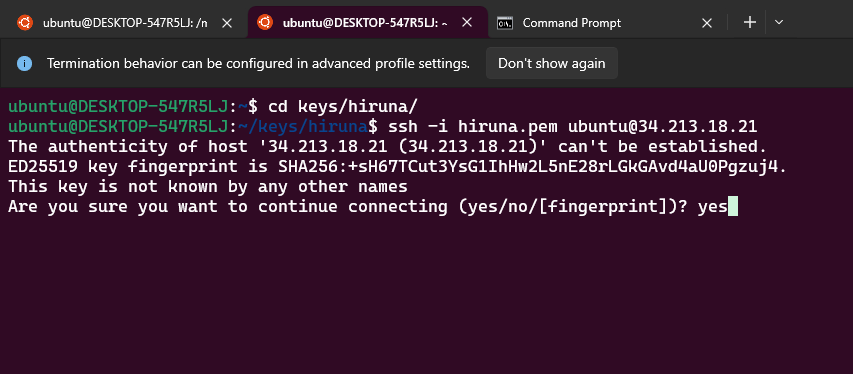
- Type "yes" and press Enter. This will log you into the server.
Step2: Check the logs
sudo tail -f /var/log/apache2/error.log
Shutting Down Moodle
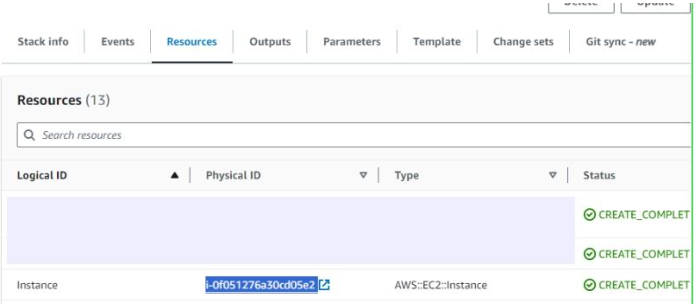
- Click the link labeled "Instance" in the "Resources" tab to access the EC2 instance, you will be directed to the Moodle instance in EC2.
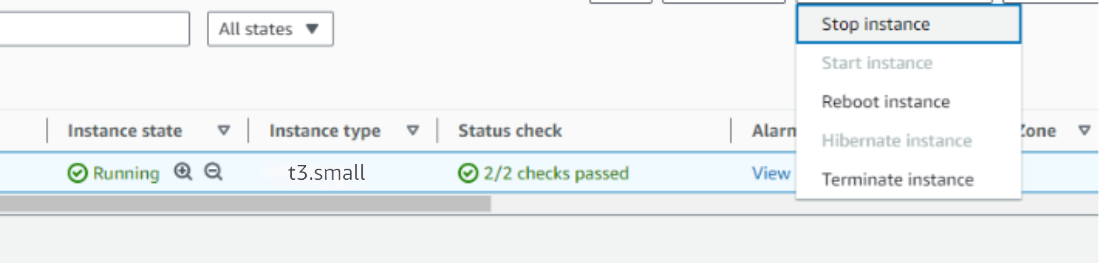
- Stop the Moodle instance by marking the checkbox and click "Stop instance" from the "Instance state" dropdown. You can restart the instance at your convenience by selecting "Start instance".
Remove Moodle
Delete the stack that has been created in the AWS Management Console under 'CloudFormation Stacks' by clicking the 'Delete' button.
Upgrades
When there is an upgrade, we will update the product with a newer version. You can check the product version in AWS Marketplace. If a newer version is available, you can remove the previous version and launch the product again using the newer version. Remember to backup the necessary server data before removing.
Troubleshoot
- If you face the following error, please follow this guide blog to increase vCPU quota.
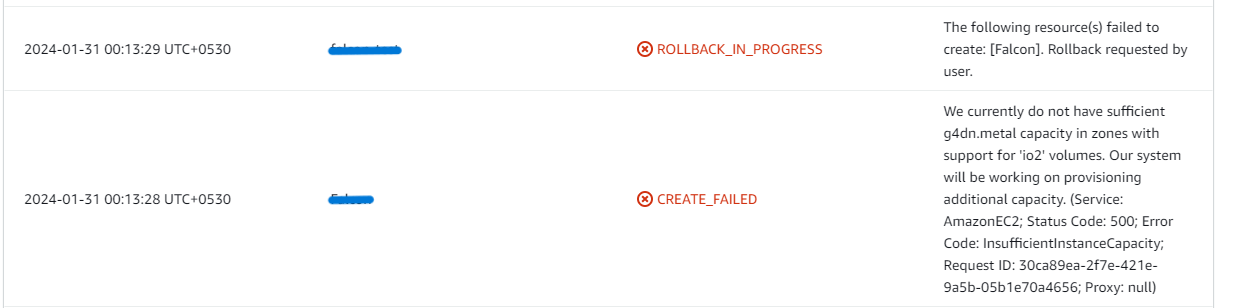
- If you face the following error (do not have sufficient <instance_type> capacity...) while creating the stack, try changing the region or try creating the stack at a later time.
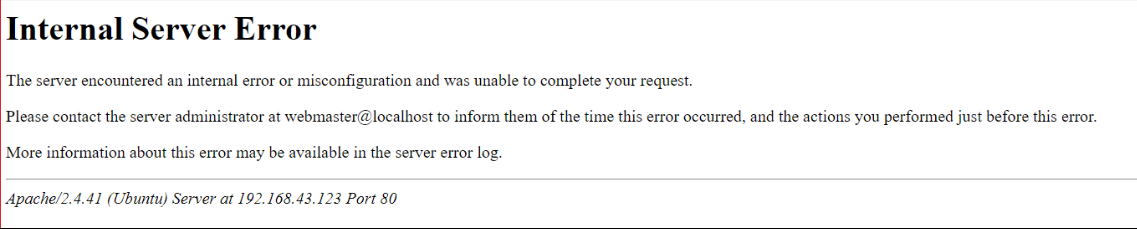
- If you face the below error, when you try to access the API dashboard, please wait 5-10 minutes and then try.
- Check whether the instance storage is full.
- Log into the server and run the below command
df -h
- root volume
- If the root volume is between 90-100%, it is better to resize EBS volume. Please follow AWS documentation to increase the EBS volume.
- Then reboot the instance and restart the apache server.
Conclusion
The Meetrix Moodle Deployment Guide helps you quickly and securely set up Moodle on AWS. Whether you're a DevOps engineer or system administrator, this guide provides step-by-step instructions to deploy Moodle in a scalable and reliable way. Moodle is a popular open-source learning platform used by schools, universities, and companies worldwide. With our deployment guide, you can host Moodle in your own AWS environment and ensure it's ready for secure, high-performance online learnings.
Technical Support
Reach out to Meetrix Support (aws@meetrix.io) for assistance with Moodle issues.