Welcome to the Meetrix OpenHands developer guide for AWS! OpenHands is an open-source platform for AI software development agents that can write and modify code, run shell commands, browse the web, and call APIs, much like a human developer working through a described task. It works with a range of LLM providers, connects directly to your GitHub, GitLab, or Bitbucket repositories, and gives you a self-hosted foundation for AI-assisted software engineering without sending your codebase through a third-party SaaS tool.
With the Meetrix pre-configured AMI, you can deploy a production-ready OpenHands instance on your own AWS account in minutes using a CloudFormation stack. This guide walks you through finding the product on AWS Marketplace, launching the stack, pointing DNS and issuing SSL, configuring an LLM provider, and connecting your first repository.
Prerequisites
Before you get started with the OpenHands AMI, ensure you have the following prerequisites:
- Basic knowledge of AWS services, including EC2 instances and CloudFormation.
- An active AWS account with appropriate permissions.
- If you encounter a vCPU quota error when launching the stack, follow https://meetrix.io/blogs/increase-aws-vcpu-quota/ to increase your vCPU limit.
Launching the AMI
Step 1: Find and Select OpenHands AMI
- Log in to your AWS Management Console.
- Navigate to 'OpenHands' in AWS Marketplace.
Step 2: Initial Setup & Configuration
- Click the "Continue to Subscribe" button.
- After subscribing, accept the terms and click "Accept Terms".
- Wait a few minutes until processing completes, then click "Continue to Configuration".
- Select "CloudFormation script to deploy OpenHands" as the fulfillment option and choose your region. Click "Continue to Launch".
- From the "Choose Action" dropdown, select "Launch CloudFormation" and click "Launch".
Create CloudFormation Stack
Step 1: Create a stack
- Ensure the "Template is ready" option is selected under "Prepare template".
- Click "Next".
Step 2: Specify stack options
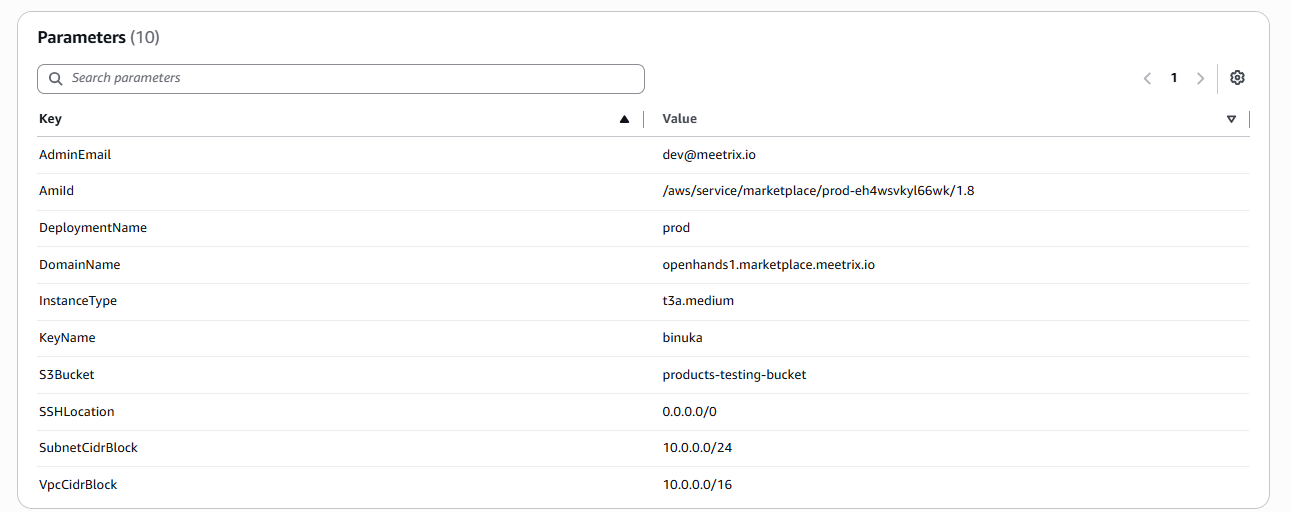
Provide a unique "Stack name", then fill in the stack parameters:
- AdminEmail - the email address used when requesting the SSL certificate.
- AmiId - pre-filled automatically from AWS Marketplace. Leave this as the default value.
- DeploymentName - a short identifier for this deployment (for example
prod). - DomainName - the public domain for your OpenHands instance (for example
openhands.yourdomain.com). OpenHands will automatically try to set up SSL if the domain is hosted on Route53. If unsuccessful, you must set up SSL manually. - InstanceType - the EC2 instance type (Recommended: t3a.medium).
- KeyName - your preferred EC2 key pair, used for SSH access.
- S3Bucket - an S3 bucket in your account that OpenHands can use for backups and file storage.
- SSHLocation - set to
0.0.0.0/0, or restrict it to your own IP range. - SubnetCidrBlock - keep as
10.0.0.0/24. - VpcCidrBlock - keep as
10.0.0.0/16.
Click "Next".
Step 3: Configure stack options
- Choose "Roll back all stack resources" and "Delete all newly created resources" under "Stack failure options".
- Click "Next".
Step 4: Review
Review and verify the details you've entered. Here's an example of a completed set of stack parameters:
Tick "I acknowledge that AWS CloudFormation might create IAM resources with custom names", then click "Submit".

Afterward, you'll be directed to the CloudFormation stacks page. Please wait for 5-10 minutes until the stack has been successfully created.
Point DNS to Your OpenHands Server
Step 1: Get the Stack Outputs
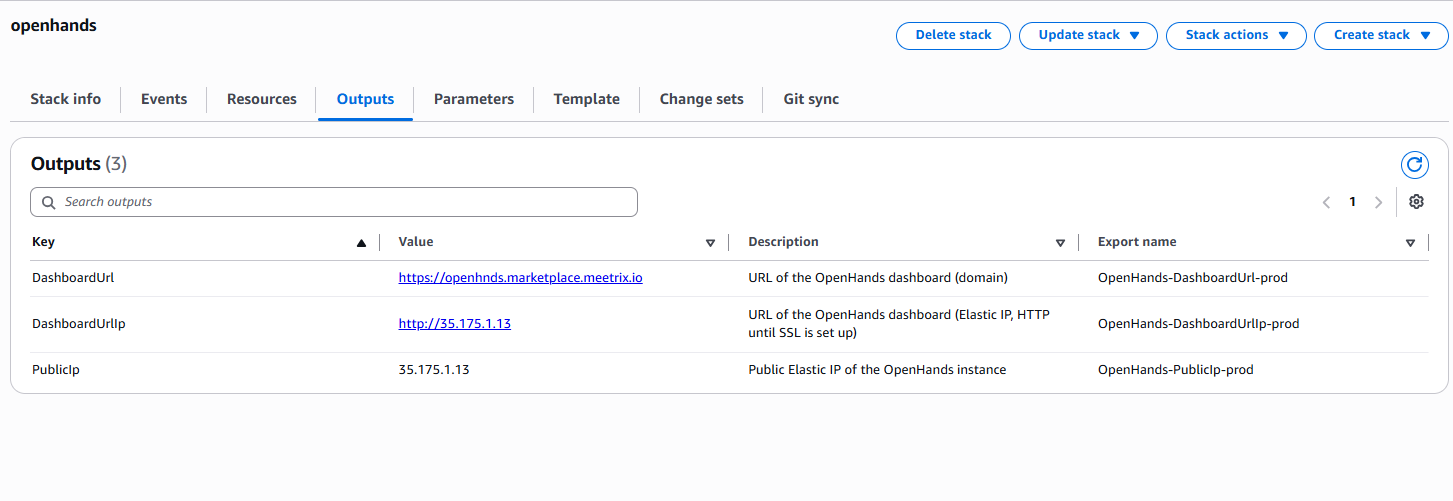
Open the "Outputs" tab of your stack. You'll see three values: DashboardUrl, DashboardUrlIp, and PublicIp.
Step 2: Copy the Public IP
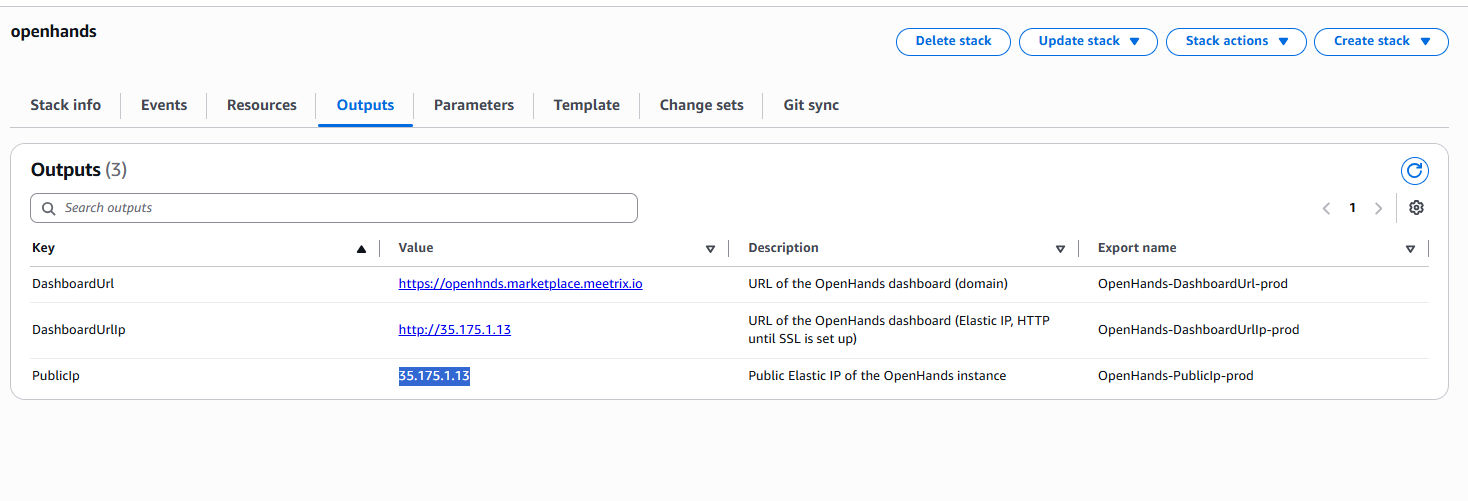
Copy the value labeled "PublicIp".
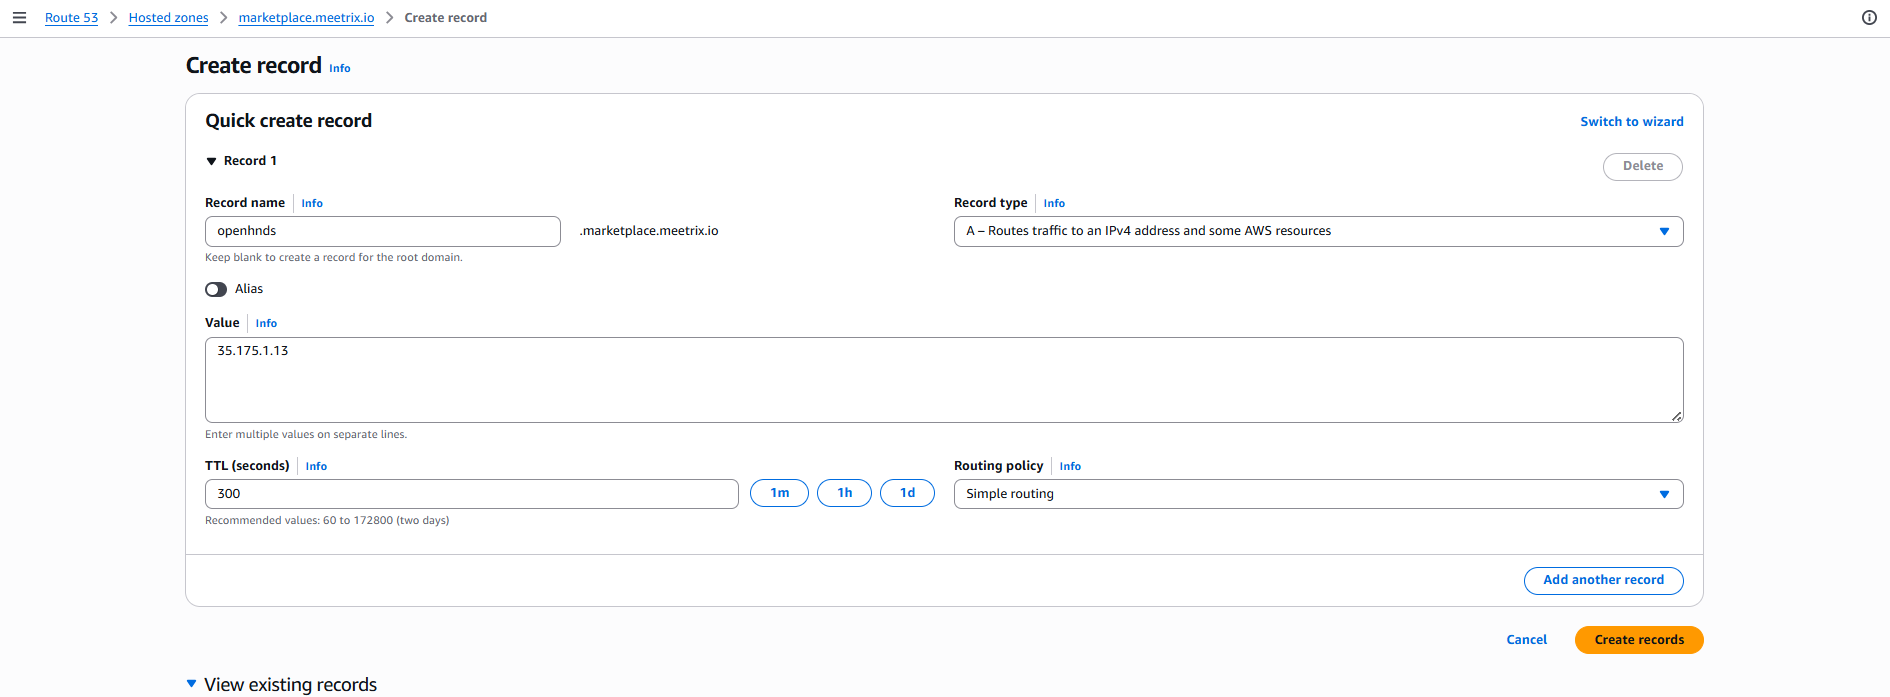
Step 3: Create a DNS Record
- Go to AWS Route 53 and navigate to "Hosted Zones".
- Click Create record.
- Add a record name matching the domain you set in DomainName, and paste the copied PublicIp into the value textbox.
- Click "Create records".
DNS must propagate first
Access OpenHands
Once DNS has propagated and SSL has issued, visit your domain. The first time you open the dashboard, OpenHands prompts you to configure an LLM provider before you can start a conversation.
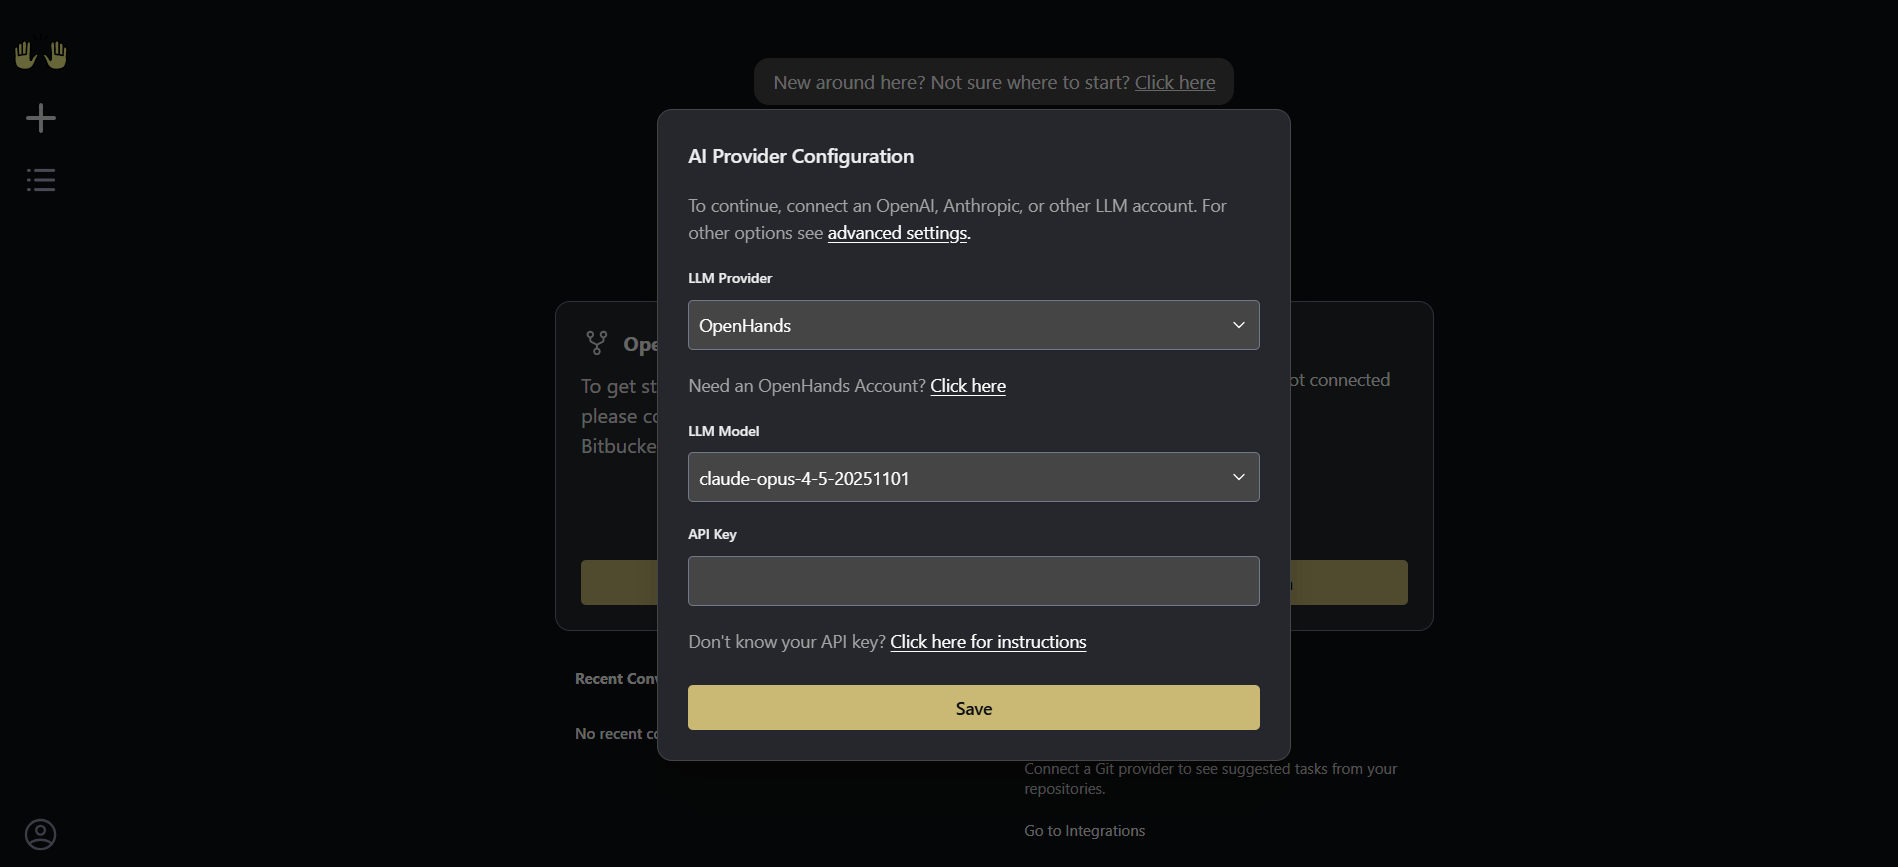
- Choose an "LLM Provider" - either the built-in OpenHands hosted option, or a provider you already have an API key for, such as Anthropic or OpenAI.
- Select an "LLM Model".
- Paste in your "API Key".
- Click "Save".
Once a provider is configured, open "Integrations" from the dashboard and connect a Git provider, such as GitHub, GitLab, or Bitbucket. OpenHands uses this connection to see your repositories and suggest tasks based on them.
Note
Generate an SSL Certificate for OpenHands Manually
OpenHands will automatically try to issue SSL for the domain name you provided as the DomainName stack parameter. If it's unsuccessful, for example if DNS hadn't propagated yet, you can generate it manually.
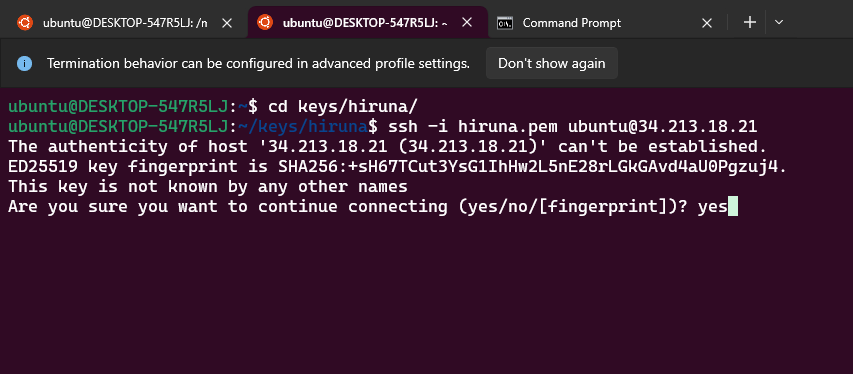
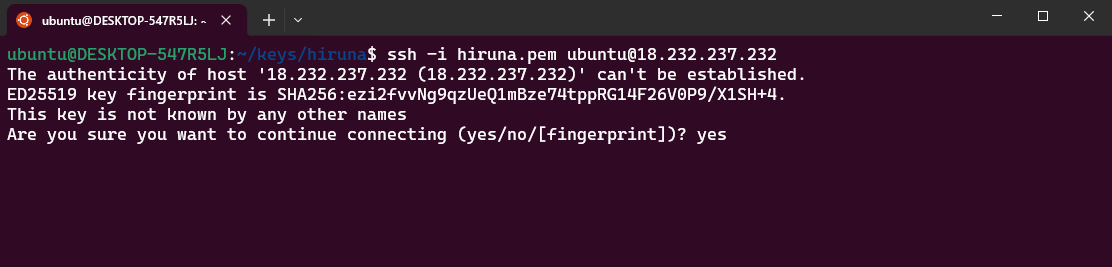
Step 1: Log in to the Server
- Open a terminal and go to the directory where your private key is located.
- Run: ssh -i <your key name> ubuntu@<Public IP address>
- Type "yes" and press Enter to confirm the host's authenticity.
Step 2: Generate SSL
Run the following command and follow the prompts:
sudo bash /root/certificate_generate_standalone.shThis script runs certbot using the domain name and admin email you provided as stack parameters.
Manage the Deployment
Stop the Instance
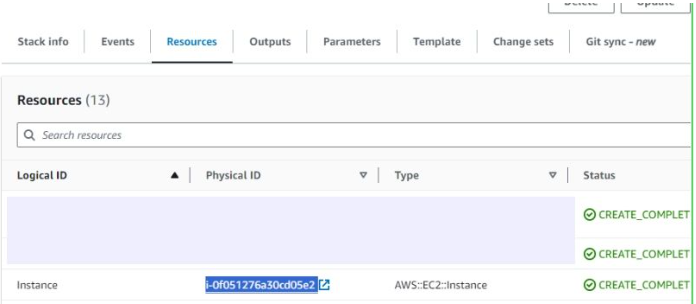
- In CloudFormation, open the "Resources" tab and click the link next to the "Instance" resource to open the EC2 instance.
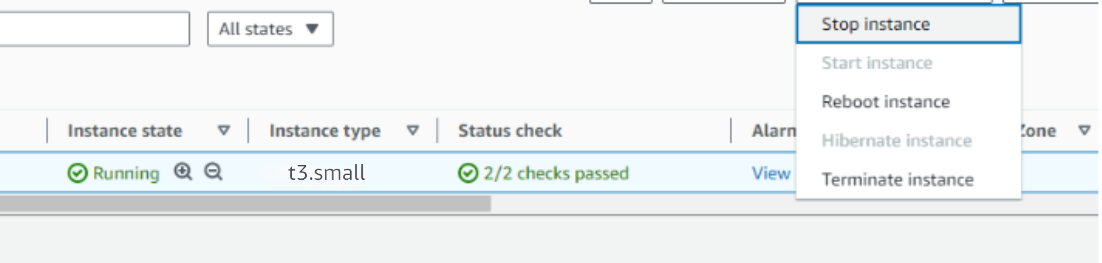
- Stop the OpenHands instance from the Instance state dropdown. You can restart it later as needed.
Remove OpenHands
Delete the CloudFormation stack from the AWS Management Console under "CloudFormation Stacks" by clicking "Delete". Back up any conversation history or workspace files you need before deleting the stack.
Upgrades
When a new version is available in AWS Marketplace, remove the previous deployment after backing up necessary server data, then relaunch with the new version.
Troubleshoot
vCPU Quota Errors
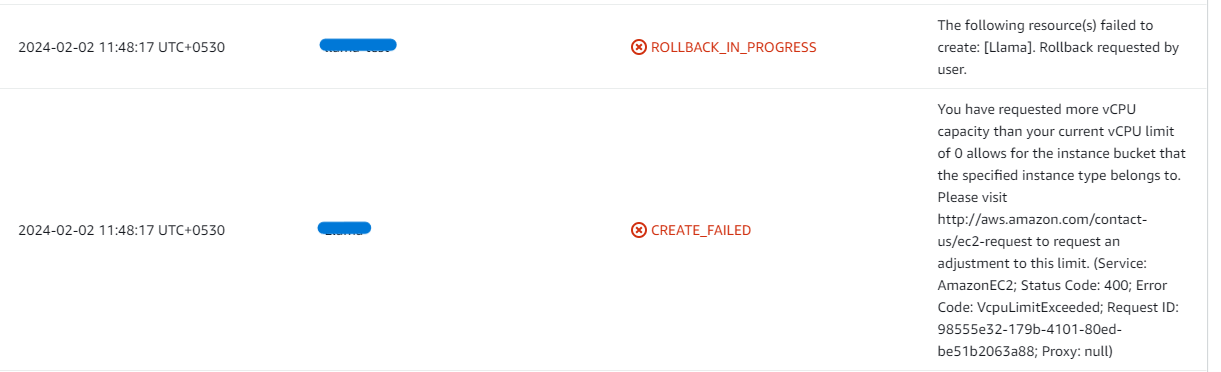
If you face vCPU quota limits, the stack will fail with a VcpuLimitExceeded error. Request an increase by following How to increase AWS quota.
Insufficient Capacity Errors
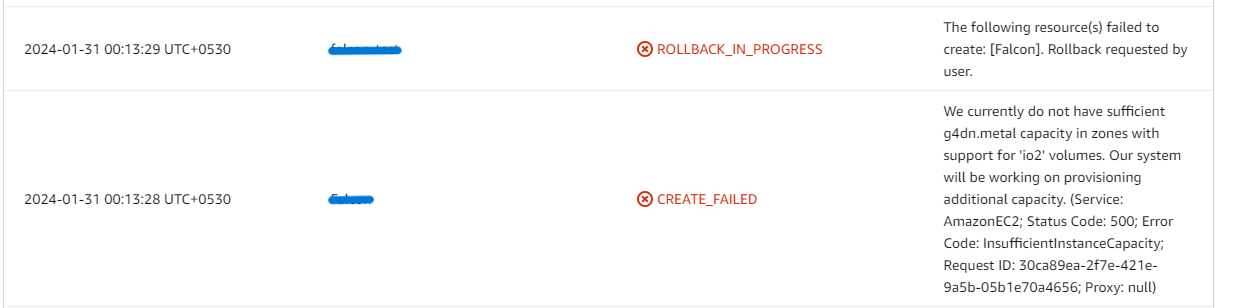
If you face an InsufficientInstanceCapacity error while creating the stack, try a different instance type, Availability Zone, or region.
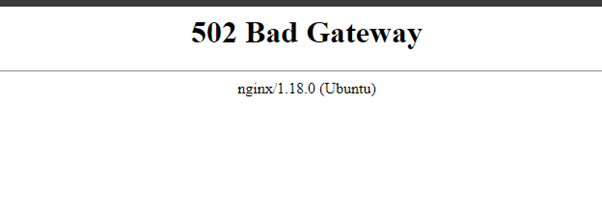
502 Bad Gateway
If the dashboard is temporarily inaccessible, wait 5-10 minutes and retry. The application is likely still starting up.
Disk Space
If OpenHands becomes unresponsive, check whether the instance storage is full:
df -h
If the root volume is between 90-100%, resize the EBS volume (per AWS docs), then reboot and restart the service.
Conclusion
The Meetrix OpenHands Deployment Guide helps you get a self-hosted AI software engineering agent running on your own AWS account in minutes. Whether you're automating routine coding tasks, reviewing pull requests, or exploring what an AI agent can do against your own repositories, this guide gives you a secure, working starting point.
Technical Support
Reach out to Meetrix Support (support@meetrix.io) for assistance with OpenHands issues.
Frequently Asked Questions
What is OpenHands?
OpenHands (formerly OpenDevin) is an open-source platform for AI software development agents. It can modify code, run shell commands, browse the web, and call APIs on your behalf, acting much like a human developer working through a task described in plain language.
What are the prerequisites for installing OpenHands on AWS?
You need basic knowledge of AWS services (EC2, CloudFormation), an active AWS account with appropriate permissions, and a sufficient vCPU limit to launch the required instance type.
Which instance type should I choose?
t3a.medium is the recommended default for getting started. Choose a larger instance type if you plan to run multiple concurrent agent sessions or work on large codebases.
Which LLM providers does OpenHands support?
OpenHands works with the built-in OpenHands hosted provider as well as your own API key for providers such as Anthropic, OpenAI, and other LLM providers. You choose a provider and model, and paste in an API key, the first time you open the dashboard.
How do I connect my GitHub, GitLab, or Bitbucket repositories?
Open the Integrations section of the OpenHands dashboard and connect a Git provider. Once connected, OpenHands can see your repositories and suggest tasks based on them.
Is there a default admin login?
No. OpenHands does not use a separate admin username or password. You access the dashboard directly at the domain you configured, and set up your LLM provider and Git integrations from there.
How do I renew the SSL certificate?
Certificates issued by Let's Encrypt renew automatically. If you generated one manually with the certificate script, you can re-run it at any time: sudo bash /root/certificate_generate_standalone.sh
How do I get technical support?
Reach out to Meetrix Support at support@meetrix.io for assistance with OpenHands issues.
Deploy OpenHands on AWS in Minutes
Launch a production-ready, self-hosted OpenHands instance on AWS with a pre-configured Meetrix image.
Get Started on AWS Marketplace