
Welcome to the Meetrix OpenVPN developer guide for Google Cloud Platform! OpenVPN is a widely adopted open-source VPN solution that builds encrypted tunnels between client devices and your private cloud infrastructure. With the Meetrix pre-configured GCP image, you can deploy a production-ready OpenVPN server in minutes.
This guide walks you through finding the product on GCP Marketplace, configuring the deployment, generating client profiles, and connecting with the OpenVPN Connect application.

Prerequisites
Before you begin, make sure you have the following:
- Basic Google Cloud Platform knowledge.
- An active Google account with a GCP project and billing enabled.
- An SSH client and an SFTP client (e.g. Termius, Cyberduck, FileZilla) installed on your local machine.
- OpenVPN Connect client installed on your local machine.
Launch the Product
Step 1: Find the Product
- Log in to your Google account.
- Go directly to the product page: OpenVPN Server on GCP Marketplace
- You can also browse all Meetrix products at the Meetrix Solutions Page.
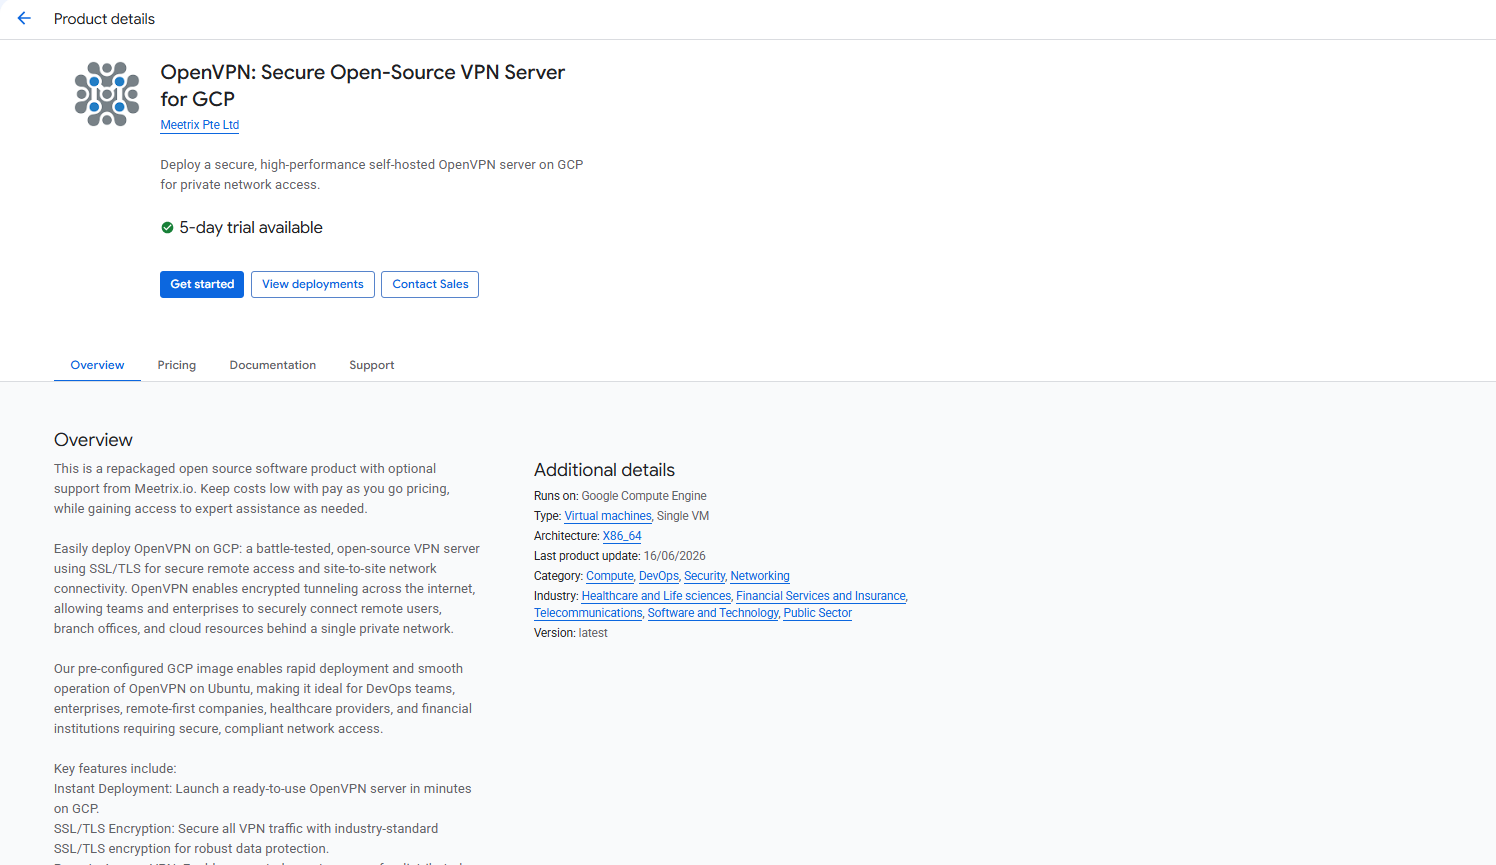
- You will see the following product listing page. Click GET STARTED.
Step 2: Accept the Terms and Agreements
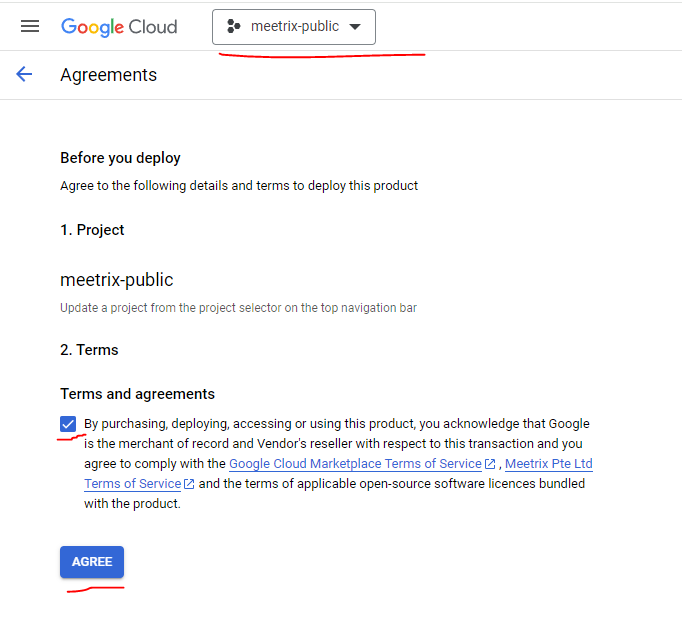
- Confirm the GCP project shown at the top of the page is the one you want to deploy into.
- Tick the terms and agreements checkbox.
- Click AGREE.
Free Trial
This product includes a 5-day free trial with license fee credits. To activate it, tick I accept the solution trial Terms and Conditions on the launch screen before proceeding.

Trial note
Step 3: Configure the Deployment
You will see the deployment configuration form. Fill in the fields across the following sections:
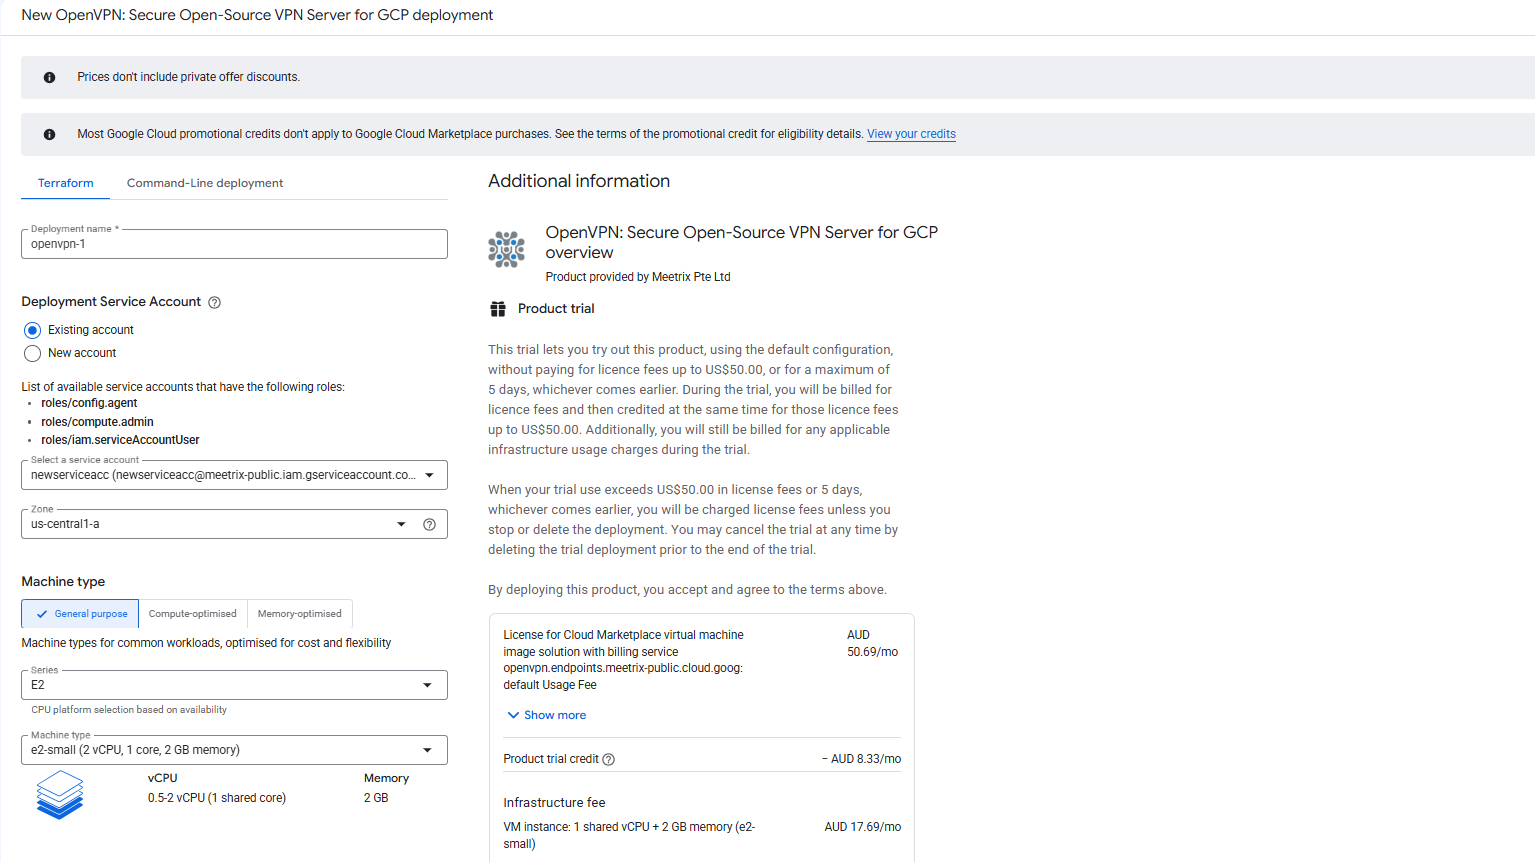
- Deployment name - A unique name for this deployment.
- Deployment Service Account - Use an existing account with the required roles, or create a new one.
- Zone - Select the GCP zone closest to your users.
- Machine type - Default
e2-small(1 shared vCPU, 2 GB RAM) works for most setups. Choose a larger type for high-traffic production use.
Step 4: Configure Networking
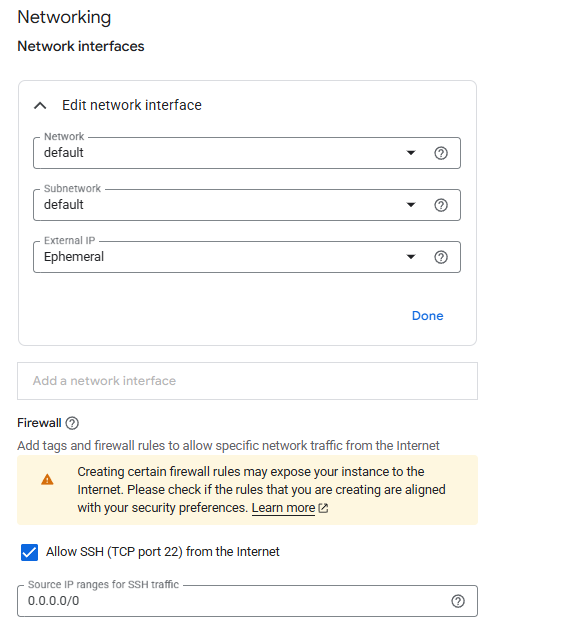
In the Networking section, leave the network and subnetwork as default unless you have a custom VPC, and keep External IP set to Ephemeral so the server is reachable over the internet.
Under Firewall, leave Allow SSH (TCP port 22) from the Internet enabled, or restrict the source IP range to your own IP for better security. The vendor-recommended firewall rule also opens UDP/1194 for the OpenVPN tunnel automatically.
Click DEPLOY and wait a few minutes for the deployment to complete.
Get the Server IP
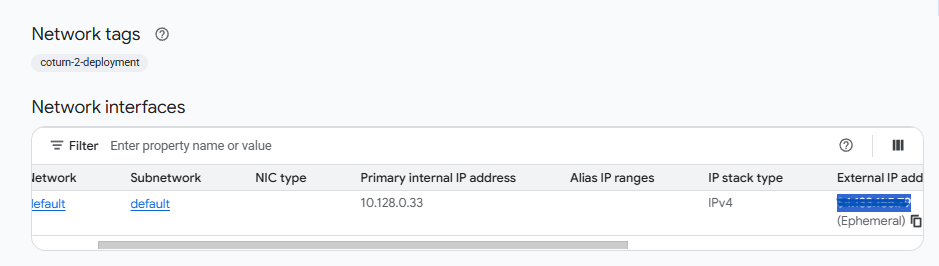
Once deployment is complete, click the VM instance resource name in the deployment details to open the network interfaces panel, and copy the External IP address. You will use this to SSH into the server and to connect from OpenVPN Connect.
Generate a Client Configuration
Step 1: Log in to the Server
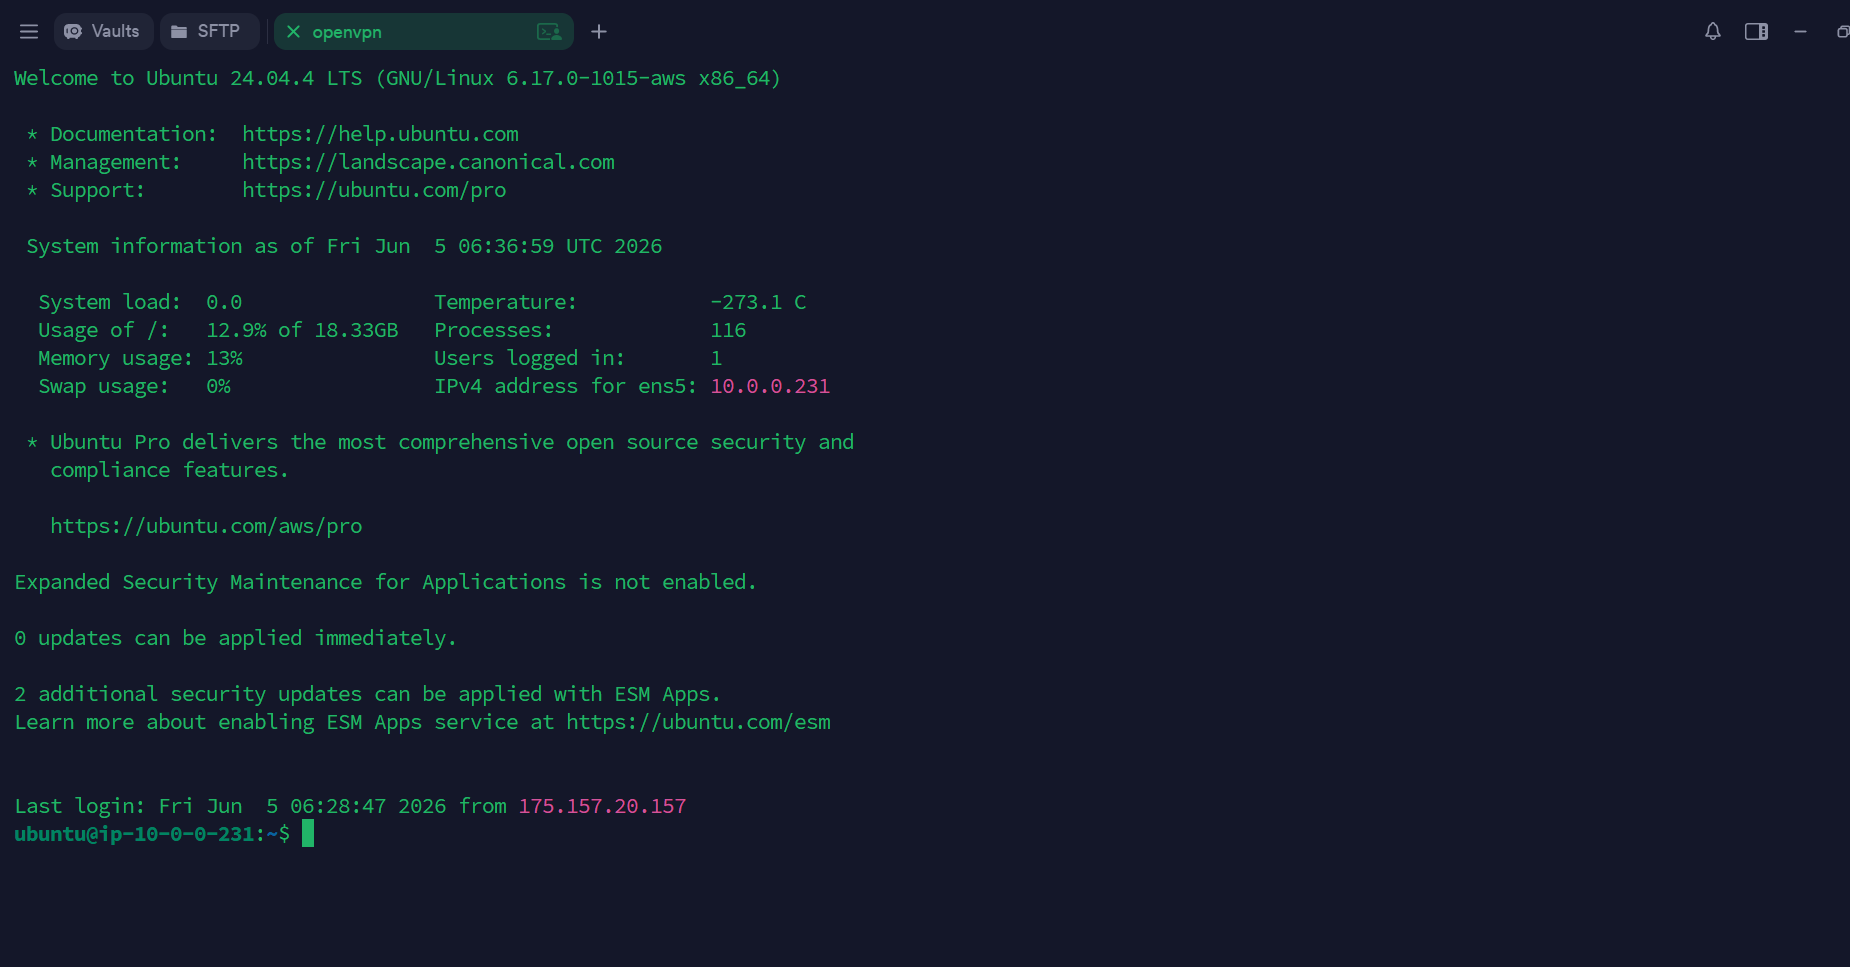
Open your SSH client and connect to the server using its external IP:
ssh -i /path/to/your-key ubuntu@<ExternalIP>You are now logged into the server.
Step 2: Add a Client
Run the built-in client generation script, replacing myclient1 with your desired client name:
sudo bash /opt/openvpn/add-client.sh myclient1The script generates a PKI certificate and produces a ready-to-use .ovpn profile file at:
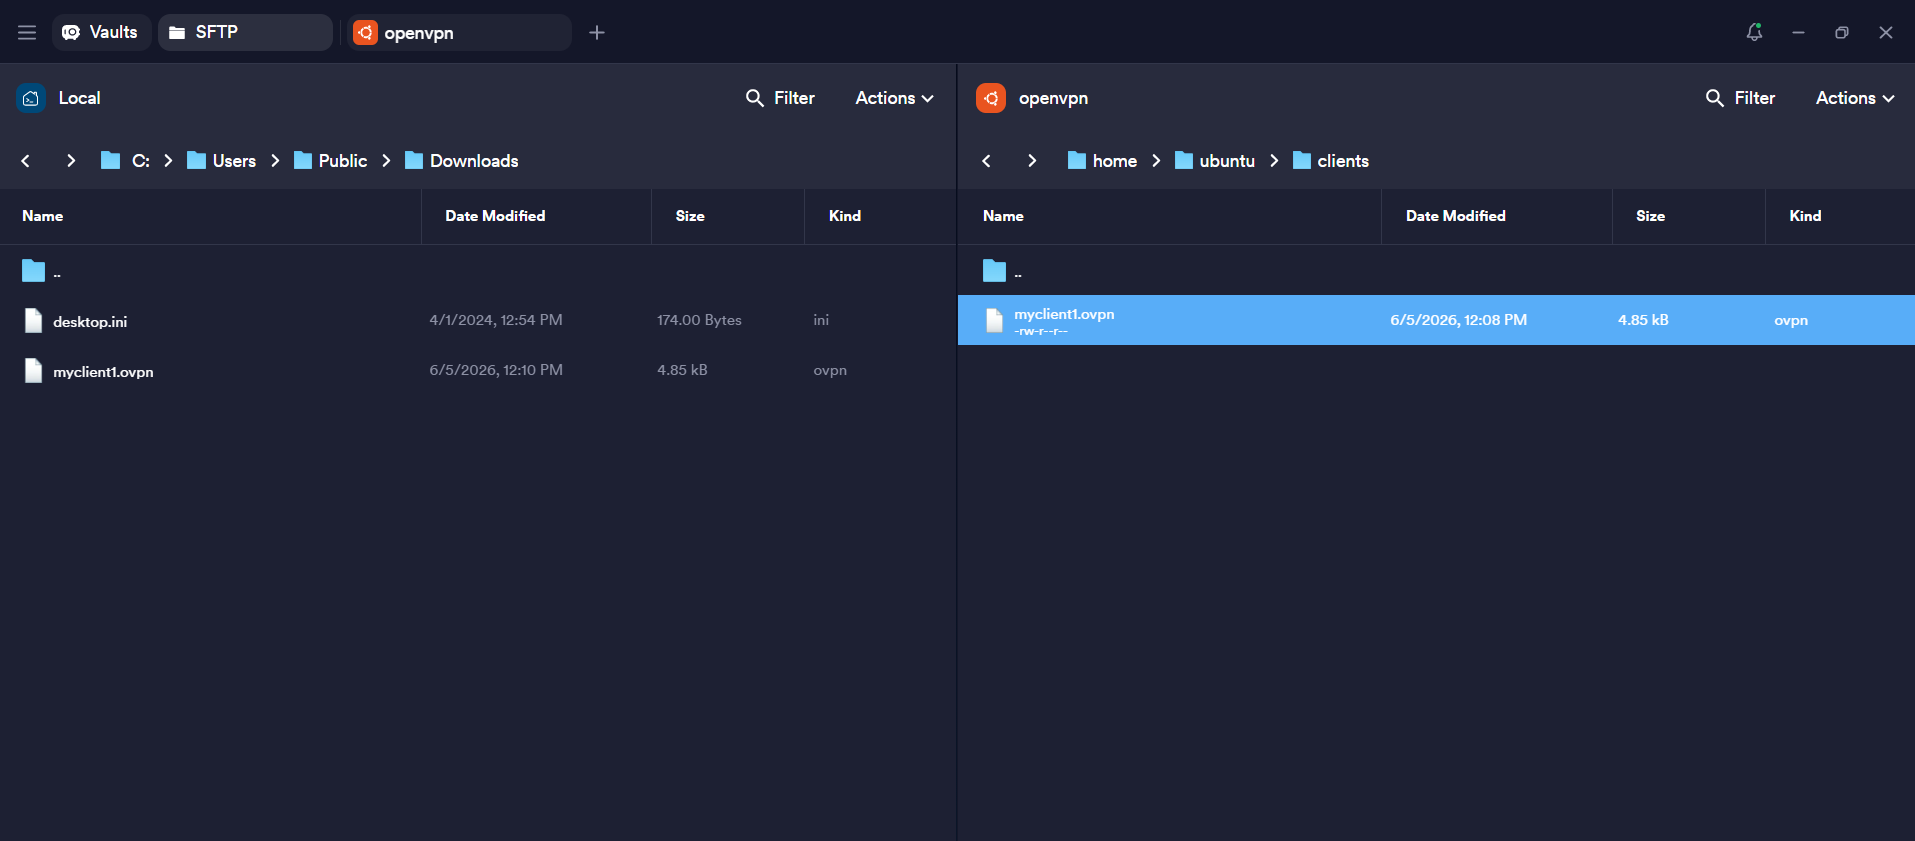
/home/ubuntu/clients/myclient1.ovpn
Download the .ovpn File
Use an SFTP client (e.g. Termius, Cyberduck, FileZilla) to connect to the server with your SSH key and download the generated profile from /home/ubuntu/clients/myclient1.ovpn to your local machine.
Alternatively, you can use scp from your terminal:
scp -i /path/to/your-key ubuntu@<ExternalIP>:/home/ubuntu/clients/myclient1.ovpn ./Connect Using OpenVPN Connect
Step 1: Open OpenVPN Connect
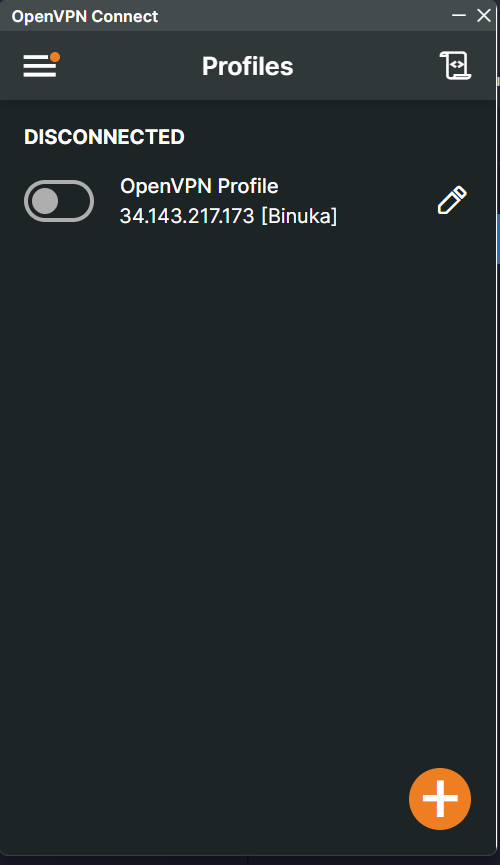
Launch the OpenVPN Connect application on your local machine and click the "+" button to import a new profile.
Step 2: Import the Profile
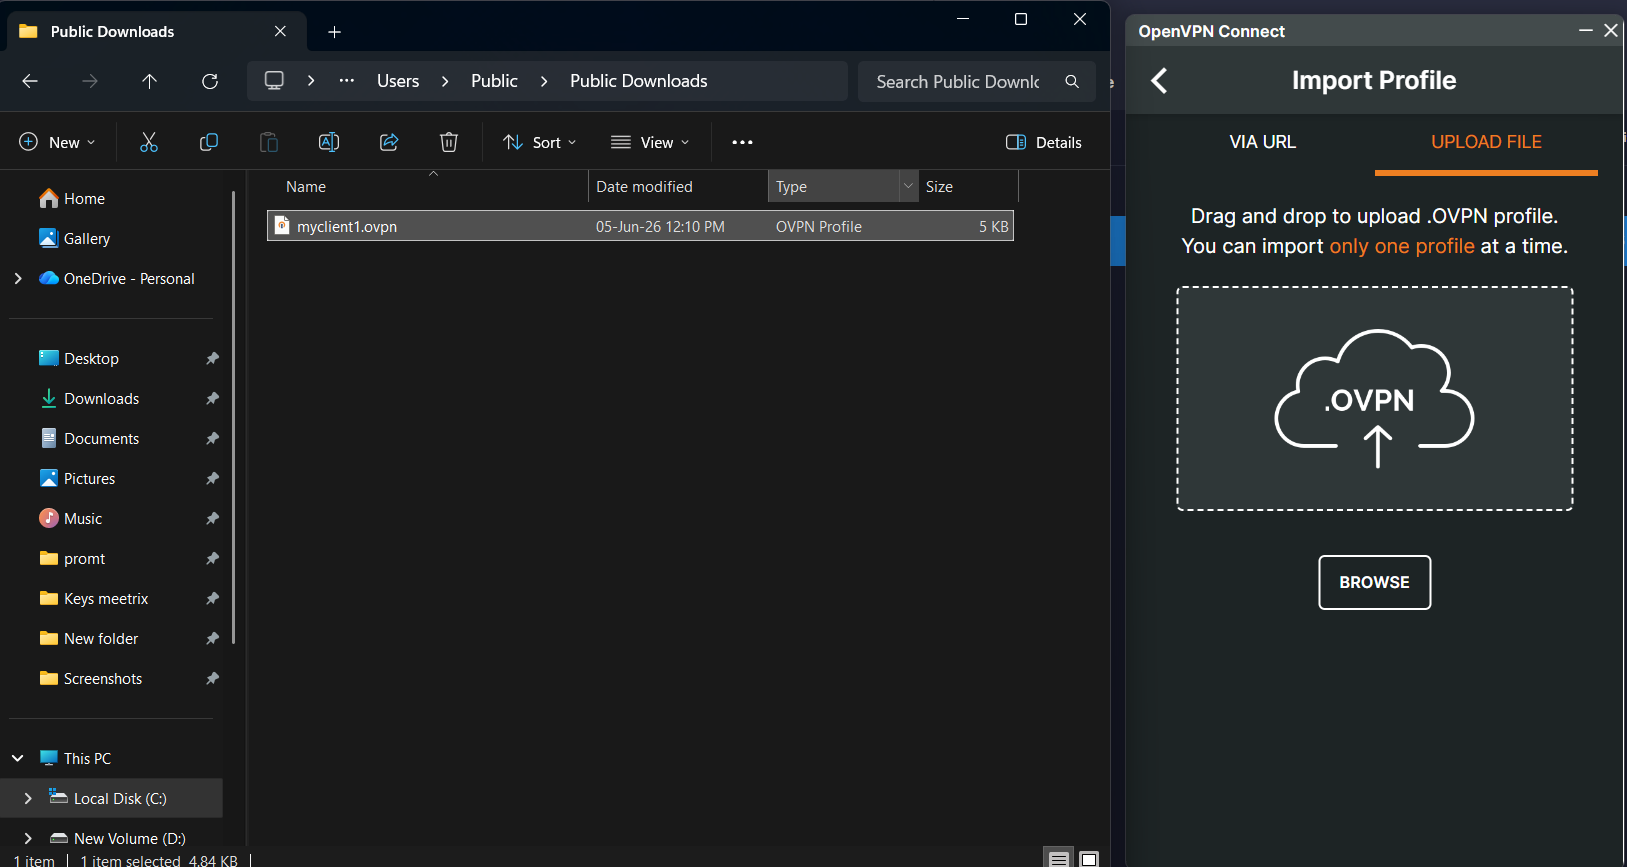
- Choose the UPLOAD FILE tab.
- Click BROWSE and select the
myclient1.ovpnfile you downloaded, or drag and drop it into the upload area.
Step 3: Connect
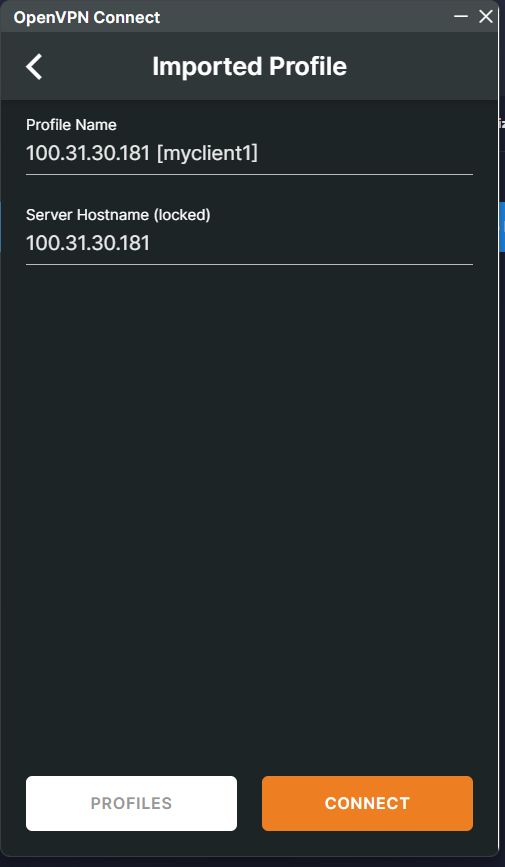
After the profile is imported, you will see the Profile Name and Server Hostname pre-filled from the .ovpn file. Click CONNECT.
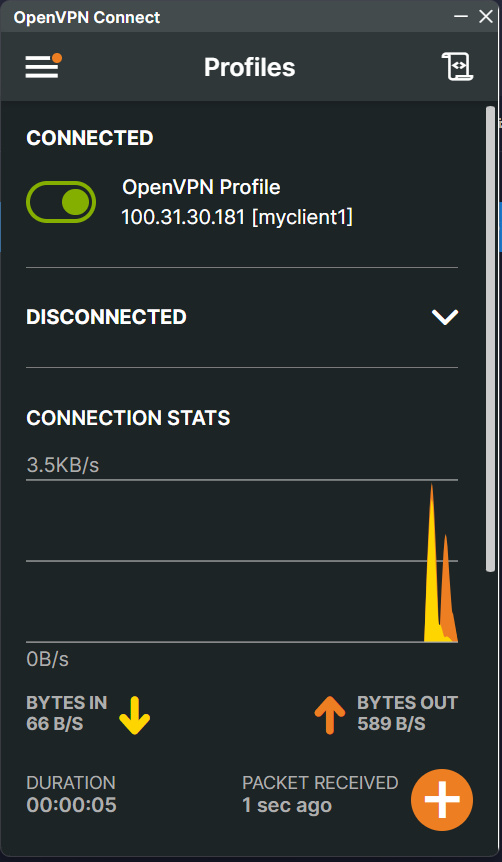
Once connected, the profile toggle turns green and the status changes to CONNECTED. The connection stats panel shows live bandwidth and packet metrics.
Check Server Logs
SSH into the server and use journalctl to follow the OpenVPN server logs in real time:
sudo journalctl -u openvpn@server -fYou will see client connection events, assigned virtual IPs, cipher negotiation, and tunnel activity.
Manage the Server
Check OpenVPN Status
sudo systemctl status openvpn@serverStop and Start OpenVPN
sudo systemctl stop openvpn@server
sudo systemctl start openvpn@server
Shut Down the VM
To stop the VM without deleting it, go to Compute Engine → VM Instances in the GCP console, select your instance, and click Stop. You can restart it at any time by clicking Start.
Delete the Deployment
To fully remove the deployment and stop all billing:
- Go to Solution deployments in the GCP console.
- Find your OpenVPN deployment.
- Click Delete to remove all associated resources.
Always back up your client .ovpn files and any custom server configuration before removing the deployment.
Upgrades
When a newer version of the OpenVPN GCP image is published, we will update the product listing in GCP Marketplace. To upgrade, check the product version on the listing page. If a newer version is available, back up your client .ovpn files and custom configuration, remove the previous deployment, and redeploy using the updated image.
Troubleshoot
Deployment Fails to Complete
If the deployment status doesn't reach a completed state, check the deployment's error details on the Solution deployments page. Insufficient quota for the selected machine type or zone is the most common cause - try a smaller machine type or a different zone.
Cannot Connect Over SSH
Confirm the firewall rule created during deployment still allows TCP port 22 from your IP. In the GCP console, go to VPC Network → Firewall and verify the rule for your instance.
OpenVPN Connect Fails to Connect
SSH into the server and check the service status and logs:
sudo systemctl status openvpn@server
sudo journalctl -u openvpn@server -f
Also confirm the firewall rule allows UDP port 1194 from the internet under VPC Network → Firewall.
Disk Usage Full
Check disk usage to ensure the instance storage is not full. Log into the server and run:
df -hIf the root volume is between 90-100% used, increase the boot disk size from the VM instance's Edit page in the GCP console, then reboot the instance.
Conclusion
The Meetrix OpenVPN developer guide for GCP helps you set up a secure VPN server on Google Cloud quickly and reliably. Whether you're a DevOps engineer securing internal service access or an administrator managing remote team connectivity, this guide provides everything you need to deploy OpenVPN, generate client profiles, and connect securely from any device.
Technical Support
If you run into any issues, our support team is here to help. Reach out to us at support@meetrix.io and we will respond within 12 hours.
Frequently Asked Questions
What ports does OpenVPN need open on GCP?
The server needs SSH (TCP/22) for management and UDP/1194 for the VPN tunnel itself. The Meetrix GCP image's vendor-recommended firewall rule opens exactly these two ports, nothing else.
How many clients can connect to one OpenVPN server?
There's no hard cap built into OpenVPN itself. Each person gets their own certificate generated via add-client.sh, and the real limit is the bandwidth and CPU of the machine type you chose during deployment.
How do I add another client after the initial setup?
SSH into the server and run sudo bash /opt/openvpn/add-client.sh <name> again with a new client name. It generates a fresh certificate and .ovpn file without affecting existing clients.
How do I revoke a client's access?
Revoke the client's certificate on the server using easy-rsa's revocation tooling, then restart the OpenVPN service. Their .ovpn file stops working immediately, no vendor ticket required.
What machine type should I use for OpenVPN on GCP?
The default e2-small (1 shared vCPU, 2 GB RAM) comfortably handles a small team. For larger teams or heavier throughput, pick a larger machine type in the deployment configuration form.
Can I change the deployment's zone after launch?
No, the zone is fixed at deployment time. To move regions, delete the current deployment from Solution deployments and redeploy in the zone you want, then reissue client profiles.
Deploy OpenVPN on GCP in Minutes
Launch a production-ready OpenVPN server on Google Cloud with a pre-configured Meetrix image.
Get Started on GCP Marketplace