Welcome to the Meetrix RustDesk developer guide for Google Cloud Platform! RustDesk is an open-source, end-to-end encrypted remote desktop tool - a self-hosted alternative to TeamViewer and AnyDesk that keeps every session on infrastructure you control. With the Meetrix pre-configured GCP image, the hbbs (rendezvous) and hbbr (relay) services are installed and running the moment the VM boots.
This guide walks you through finding the product on GCP Marketplace, configuring the deployment, reserving a static IP, pointing clients at your server, and troubleshooting common issues.
Prerequisites
Before you begin, make sure you have the following:
- Basic Google Cloud Platform knowledge.
- An active Google account with a GCP project and billing enabled.
- The RustDesk desktop, mobile, or web client installed on the machines you want to connect from.
- A domain name you can manage DNS records for (optional - an IP address works too).
Launch the Product
Step 1: Find the Product
- Log in to your Google account.
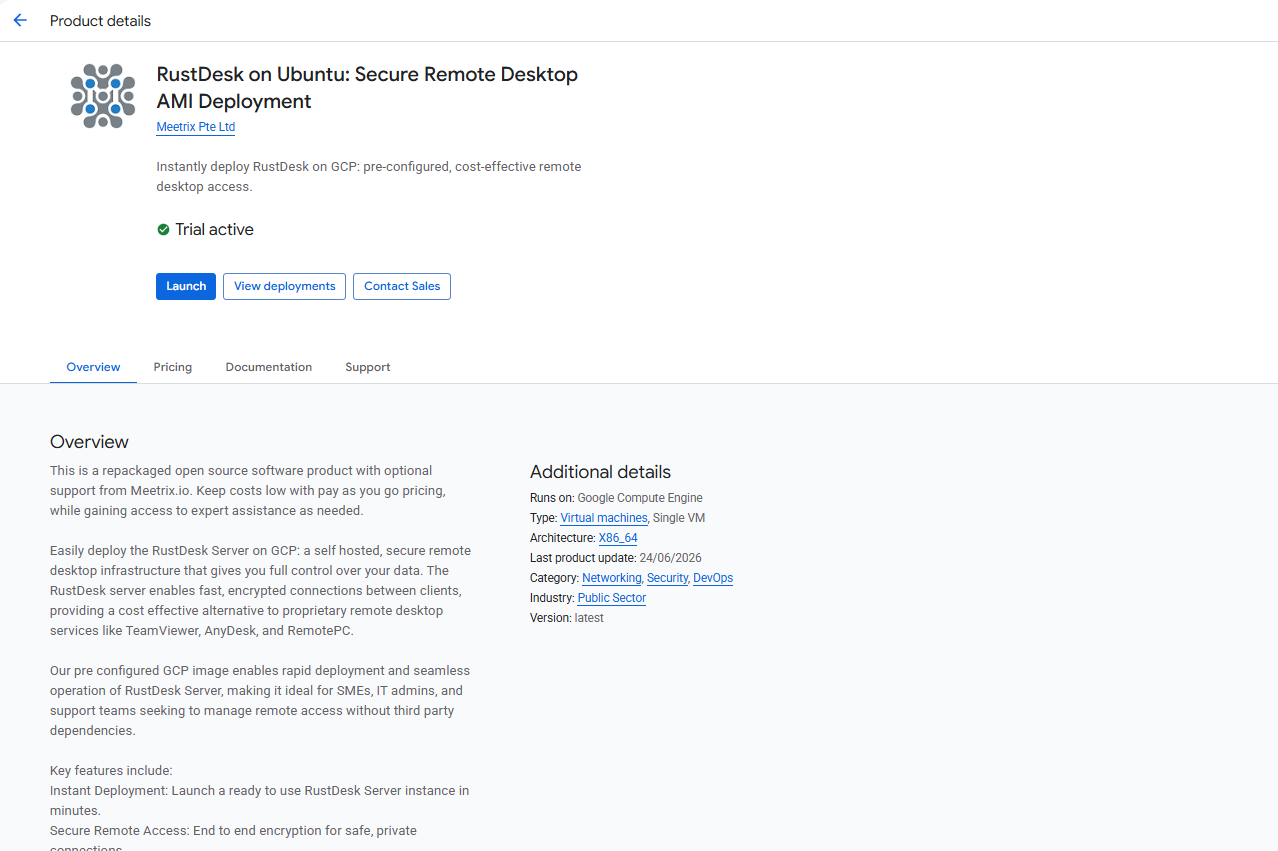
- Go directly to the product page: RustDesk on Ubuntu: Secure Remote Desktop AMI Deployment
- You can also browse all Meetrix products at the Meetrix Solutions Page.
- You will see the product listing page. Click Launch.
Step 2: Accept the Agreements
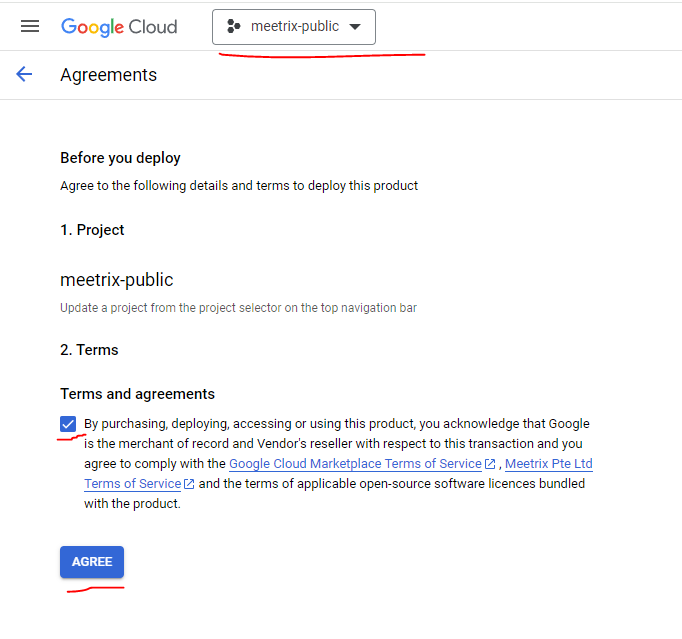
- Confirm your GCP project is selected.
- Tick the box under Terms and agreements to accept the Google Cloud Marketplace and Meetrix Pte Ltd terms of service.
- Click AGREE.
Free Trial
This product includes a 5-day free trial with up to USD 50.00 in licence fee credits. To activate it, tick I accept the solution trial Terms and Conditions on the launch screen before proceeding.

Trial note
Step 3: Configure the Deployment
You will see the deployment configuration form, with Terraform and Command-Line deployment tabs. Fill in the fields across the following sections:
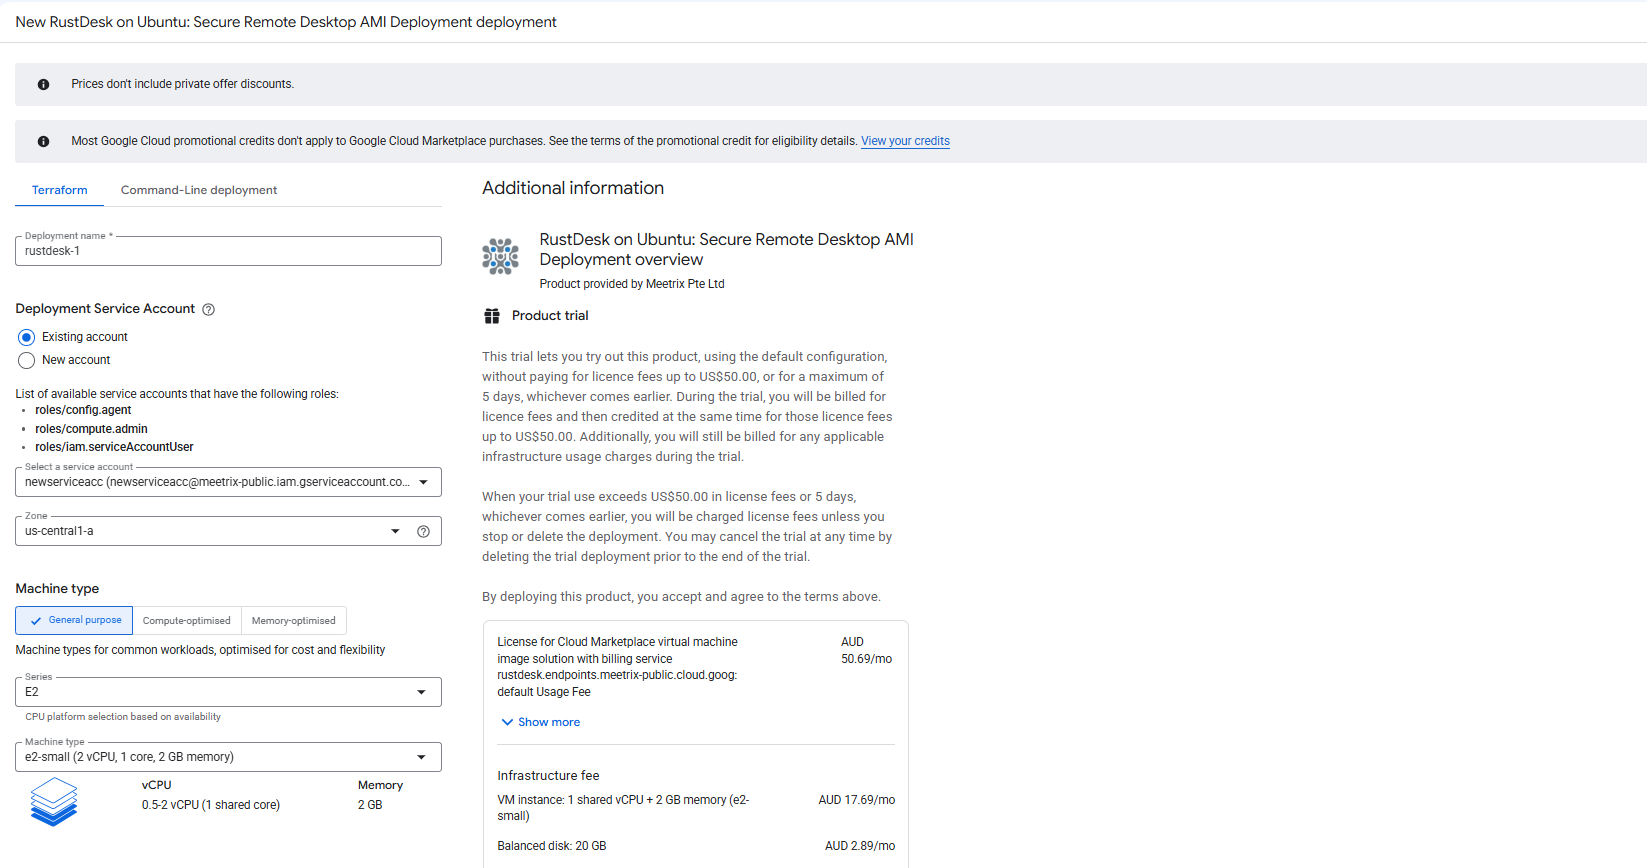
General
- Deployment name - A unique name for this deployment.
- Deployment Service Account - Use an existing service account with the
compute.admin,config.agent, andiam.serviceAccountUserroles, or create a new one. - Zone - Select the GCP zone closest to your users (e.g.
us-central1-a). - Machine type - Default
e2-small(up to 2 vCPU, 2 GB RAM) suits a small team. Choose a larger type for heavier concurrent usage.
Boot Disk
- Boot disk type - Default
Balanced persistent diskis recommended. - Boot disk size - Default 20 GB is sufficient.
Networking
- Network / Subnetwork - Leave as
defaultunless you have a custom VPC. - External IP - Leave as
Ephemeralfor now. You will reserve a static IP in the next section before distributing the address to clients. - Allow SSH (TCP port 22) - Enabled by default. Restrict the source IP range if you want to limit SSH access to specific IPs.
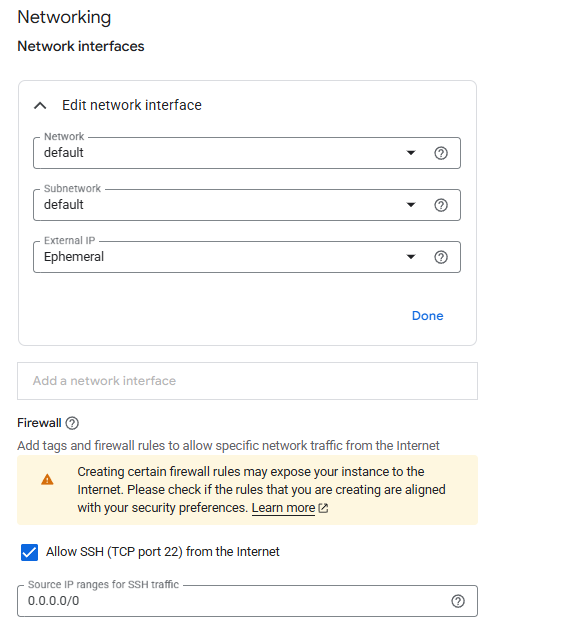
Once the fields are filled in, follow the on-screen instructions in your chosen tab (Terraform or Command-Line deployment) to deploy, and wait a few minutes for the deployment to complete.
Reserve a Static IP
Do this before sharing your server address
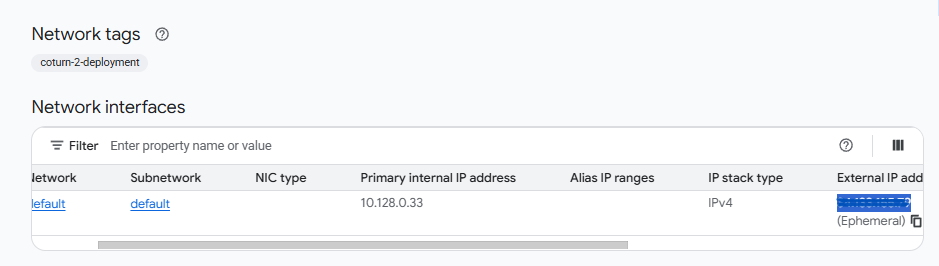
- Open the VM instance created by the deployment and note the External IP under Network interfaces - it is marked
(Ephemeral). - In the GCP console, go to VPC network → IP addresses, find that same address, and click Reserve Static Address (or promote it directly from the VM instance details page).
- Copy the reserved external IP - you will enter this into every RustDesk client.
Point DNS to the Server (Optional)
If you prefer a hostname over a raw IP:
- Go to your DNS provider.
- Add an A record pointing your chosen subdomain (e.g.
remote.yourdomain.com) to the reserved static IP. - Wait for DNS propagation before proceeding (typically a few minutes to 1 hour).
SSH into the Server
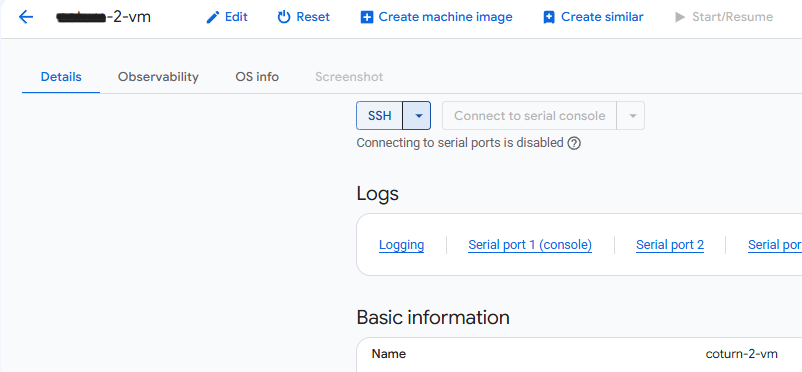
- Go to the VM instance page in the GCP console.
- Click SSH to open a browser-based terminal and authorize access.
Install and Configure the RustDesk Client
Step 1: Download the Client
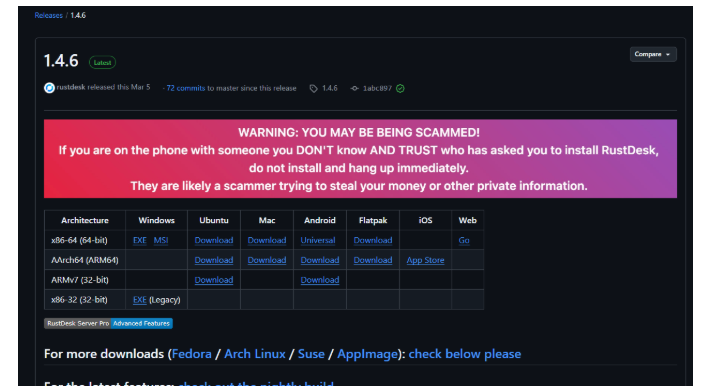
- Go to the RustDesk releases page.
- Download the installer for your operating system (Windows, macOS, Linux, Android, or iOS).
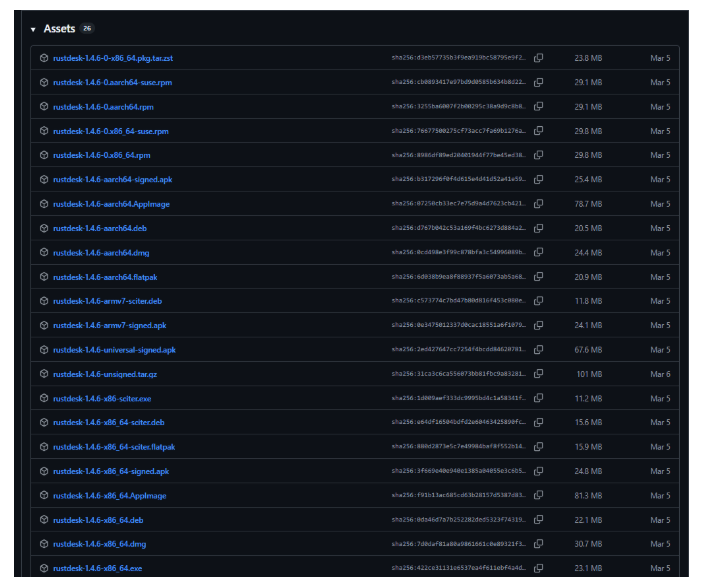
If you need a specific build (e.g. an older architecture or package format), scroll down to the Assets list on the same release and pick the matching file.
Step 2: Open the Client
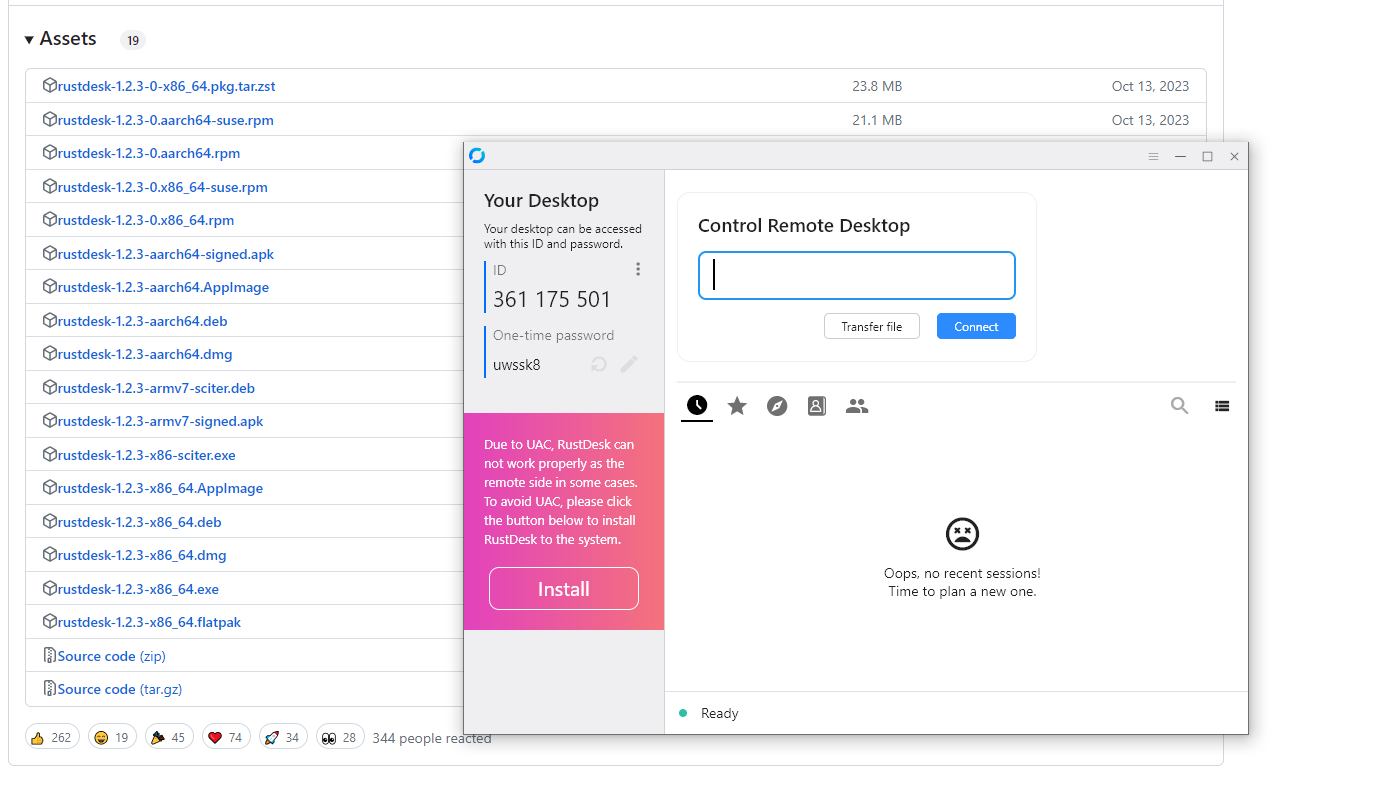
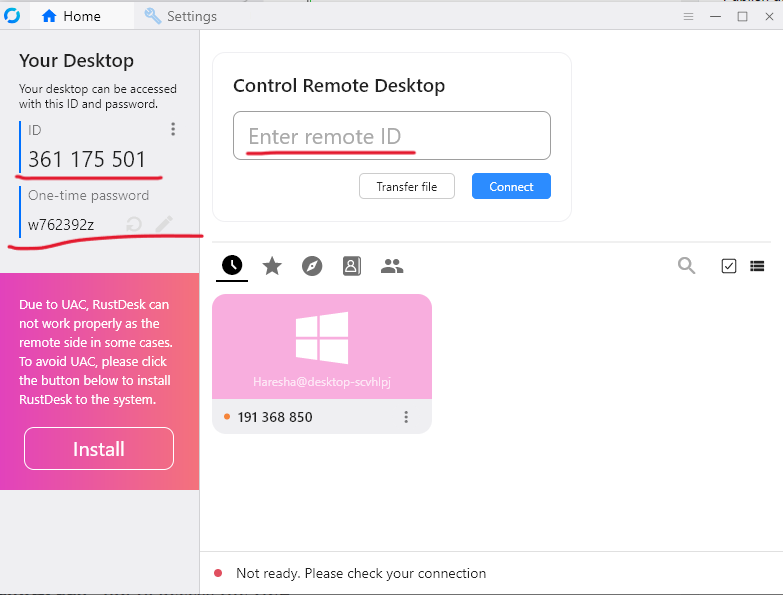
Install and open RustDesk. The Home tab shows your own device's ID and a one-time password - this is what other machines will use to connect to this device once it also points at your server.
Step 3: Retrieve the Server Key
The Meetrix image secures rendezvous traffic with a key pair, so each client needs the server's public key in addition to its IP address. SSH into the server and open the generated public key file:
sudo nano /opt/rustdesk/data/id_ed25519.pub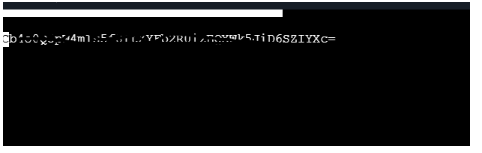
Copy the key value - you will paste it into the client's Network settings next.
Step 4: Point the Client at Your Server
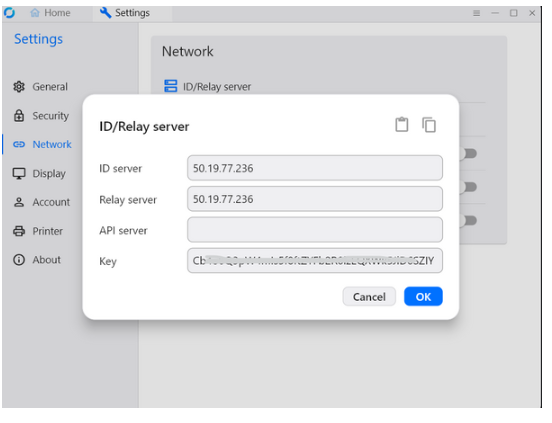
- Open the RustDesk client and go to Settings → Network → ID/Relay server.
- Enter your reserved static IP (or domain) in both ID server and Relay server.
- Paste the public key you copied from the server into the Key field.
- Click OK, then repeat this on every machine you want to connect to or from.
Step 5: Connect
Once both machines point at your server, enter the host's ID in the Control Remote Desktop field on the client and click Connect. You will be prompted for the one-time password shown on the host's Home tab.
Manage the Server
Restart the Services
sudo docker restart <container_name>Shut Down the VM
To stop the VM without deleting it, go to Compute Engine → VM Instances in the GCP console, select your instance, and click Stop.
Delete the Deployment
To fully remove the deployment and stop all billing:
- Go to Solution deployments in the GCP console.
- Find your RustDesk deployment.
- Click Delete to remove all associated resources.
Troubleshoot
Check the Service Logs
RustDesk runs on Docker. Find the running containers and check their logs:
sudo docker ps -a
sudo docker logs <container_name>
Verify Firewall Ports
In the GCP console, go to VPC Network → Firewall and confirm the following rules exist for your VM:
| Service | Ports | Protocol |
|---|---|---|
| hbbs (rendezvous) | 21115, 21116, 21118 | TCP |
| hbbs (rendezvous) | 21116 | UDP |
| hbbr (relay) | 21117, 21119 | TCP |
Client Cannot Connect
If clients cannot reach the server, double-check that the ID/Relay server field on every client matches the reserved static IP exactly, that the Key field matches the server's public key, and that the firewall rules above are attached to the VM's network tag.
Conclusion
The Meetrix RustDesk developer guide helps you get a self-hosted, encrypted remote desktop server running on GCP without spending hours wiring up hbbs and hbbr by hand. Reserve a static IP, point your clients at it, and you have a private alternative to per-seat remote desktop tools running on infrastructure you control.
Technical Support
If you run into any issues, our support team is here to help. Reach out to us at support@meetrix.io and we will respond within 12 hours.
Frequently Asked Questions
What ports does RustDesk need open on GCP?
The hbbs (rendezvous) service needs TCP and UDP 21116, plus TCP 21115 and 21118, while hbbr (relay) needs TCP 21117 and 21119. The Meetrix GCP image configures these firewall rules automatically during deployment.
Why does the client ask for a Key, not just a server address?
The Meetrix image secures the rendezvous connection with a key pair. Enter the server's IP as both ID server and Relay server, then paste the public key (found at /opt/rustdesk/data/id_ed25519.pub on the server) into the client's Key field - without it, clients cannot authenticate to your server.
Do I need a domain name to use RustDesk on GCP?
No. You can connect clients directly using the VM's external IP address. A domain is only needed if you want a stable hostname or plan to issue a TLS certificate for the web client.
Why should I reserve a static IP before launching?
An ephemeral IP changes if the VM restarts, which breaks every client that has the old address saved as its ID/Relay server. Reserving a static external IP in GCP keeps client configuration stable.
What is the default instance type and can I change it?
The default configuration uses an e2-small instance. This comfortably handles a small team; scale up to a larger machine type in the deployment form if you expect heavier concurrent usage.
How do I check that hbbs and hbbr are running?
SSH into the server and run: sudo docker ps -a. Both the hbbs and hbbr containers should show a status of Up.
Can I use this server with the RustDesk mobile and web clients?
Yes. Enter the same server IP or domain as the ID/Relay server in the RustDesk Android, iOS, or web client settings, exactly as you would in the desktop client.
Deploy RustDesk on GCP in Minutes
Launch a production-ready, self-hosted RustDesk server on Google Cloud with a pre-configured Meetrix image.
Get Started on GCP Marketplace